Last updated on May 10th, 2022 at 09:10 am
Integrate Azure with ForgeRock Identity Cloud using SAML2.
Security infrastructure teams seek to integrate various applications and vendor ecosystems to create a holistic experience for the user base they serve.
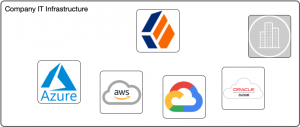
Microsoft Azure is one of the most commonly used of these ecosystems. Many organizations use Azure to various extents. It is a well-rounded environment and great to operate Microsoft applications and infrastructure. Azure is a simple term for a plethora of functionality, and as such a very ambiguous word, that means different things to different people.
In my life as an identity and access management (IAM) professional and for the purpose of this article, Azure refers specifically to the identity and access management capabilities in Microsoft Azure.
With the release of ForgeRock Identity Cloud, customers and prospects alike are exploring how this specialized IAM service can provide a simple and seamless user experience, improve their security posture, and help them integrate disparate application landscapes. ForgeRock Identity Cloud facilitates ecosystem and application integration through capabilities that go beyond what any of the general purpose vendors provide. As such, ForgeRock is often utilized as the governing IAM platform in organizations of all sizes.

For users of any kind (customers, partners, employees) easy access to applications and services is what matters most, which ecosystem these applications and services live in and how they are being secured is ideally transparent to them. Open standards, such as SAML 2.0, OAuth 2.0, OpenID Connect 1.0, should be employed to allow users to access services outside the ecosystem they originally logged into.
Figure 2 seems to indicate that ForgeRock is where everybody logs into and then ventures out to access applications and services in all these other ecosystems, armed with a ForgeRock session. But that is often not the case, at least not for all the different groups of users. In fact, which system governs (ForgeRock in Figure 2) and where users login initially (where their first session originates) are often not the same.
In my experience, 9 out of 10 mature companies use a Microsoft infrastructure for employees. Microsoft infrastructure is managed most effectively using Microsoft tools and services. This typically involves Windows Servers running Active Directory managing Windows workstations and other resources. The Microsoft infrastructure backend services are now also available in the cloud, referred to in this context as Azure, or more specifically as Azure Active Directory, or Azure AD, or AAD. In such a Microsoft environment, employees access services from their Windows workstations, and thus the first ecosystem they login to is Microsoft, either on-prem or in the cloud.
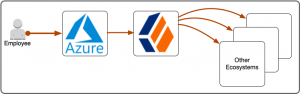
Typically, companies ask that access to employee resources be granted seamlessly once an employee has logged into their workstation, which gives the user a session in the Microsoft ecosystem. For this article, I assume a cloud-based Microsoft ecosystem: Azure. So now let’s overlay the user journey, where they login and where they venture out to on top of Figure 2.
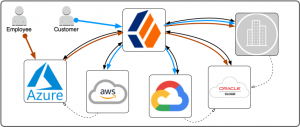
Red symbolizes an employee, blue a customer. They start their journey in different ecosystems in this example. For the remainder of this article, I focus on the red employee journey, which starts in the Microsoft ecosystem, and then takes the user into other ecosystems, using ForgeRock as a session broker.
And, zooming in one more level, this article focuses on the integration between Azure and ForgeRock Identity Cloud using SAML 2.0 federation. In SAML, the 3 main roles are:
- End User
- Identity Provider (IDP)
- Service Provider (SP)
The end user (employee) is the main actor, trying to access an application (the service provider), which is protected by the identity provider (the IDP knows the user and can assert its identity through a login process). Both, IDP-initiated and SP-initiated flows are possible and have different merits, making one or the other better suited for any desired user experience or security requirement.
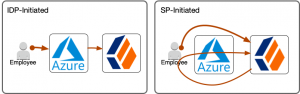
The flows in Figure 5 are user experience flows, not the technical SAML protocol flows, which you can study in the ForgeRock documentation or the SAML 2.0 specification. The differences in user experience are not really noticeable, at least not in the way the boomerang arrow of the SP-initiated flow in Figure 5 indicates. However, the differences are significant. Think about it as the center of gravity being on the IDP side in the IDP-initiated flow, while it is on the SP side in the SP-initiated flow and think of gravity as control:
- The IDP-initiated flow leaves the IDP in control over how the user logs in where the user ends up at the end of the flow.
- The SP-initiated flow shifts control to the SP, which starts in control, hands it over to the IDP for authentication and retakes control right after. The SP can now perform additional tasks like MFA and determines where to send the user at the end of the flow (read about ForgeRock’s integrated mode).
In the scenario where ForgeRock is the main IAM hub and integration layer, the SP-initiated flow keeps control on the ForgeRock (SP) side, even if Azure acts as the IDP. This article series shows how to implement both flows.
Configure SAML Integration
Both flows, SP-initiated and IDP-initiated, require very similar configuration steps, yet with important differences. Even though SAML is an open standard, its configuration differs greatly between vendors and implementations and involves vendor-specific steps, terminology, and configuration.
Prerequisites
- ForgeRock Identity Cloud tenant admin access
- Azure Active Directory tenant admin access
Configure SP-Initiated Flow (Integrated Mode)
- Create Circle Of Trust in ForgeRock Identity Cloud
- Create hosted Service Provider in ForgeRock Identity Cloud
- Export metadata from ForgeRock Identity Cloud
- Create enterprise application in Azure AD
- Upload ForgeRock metadata into enterprise application and configure IDP settings
- Download and modify Azure metadata from enterprise application
- Create remote IDP in ForgeRock Identity Cloud by importing Azure metadata
- Create authentication journey to control login flow
1. Create Circle Of Trust in ForgeRock Identity Cloud
Identity Cloud groups identity providers and service providers who agree to share authentication information into circles of trust. The first step is to create a circle of trust for this Azure integration.
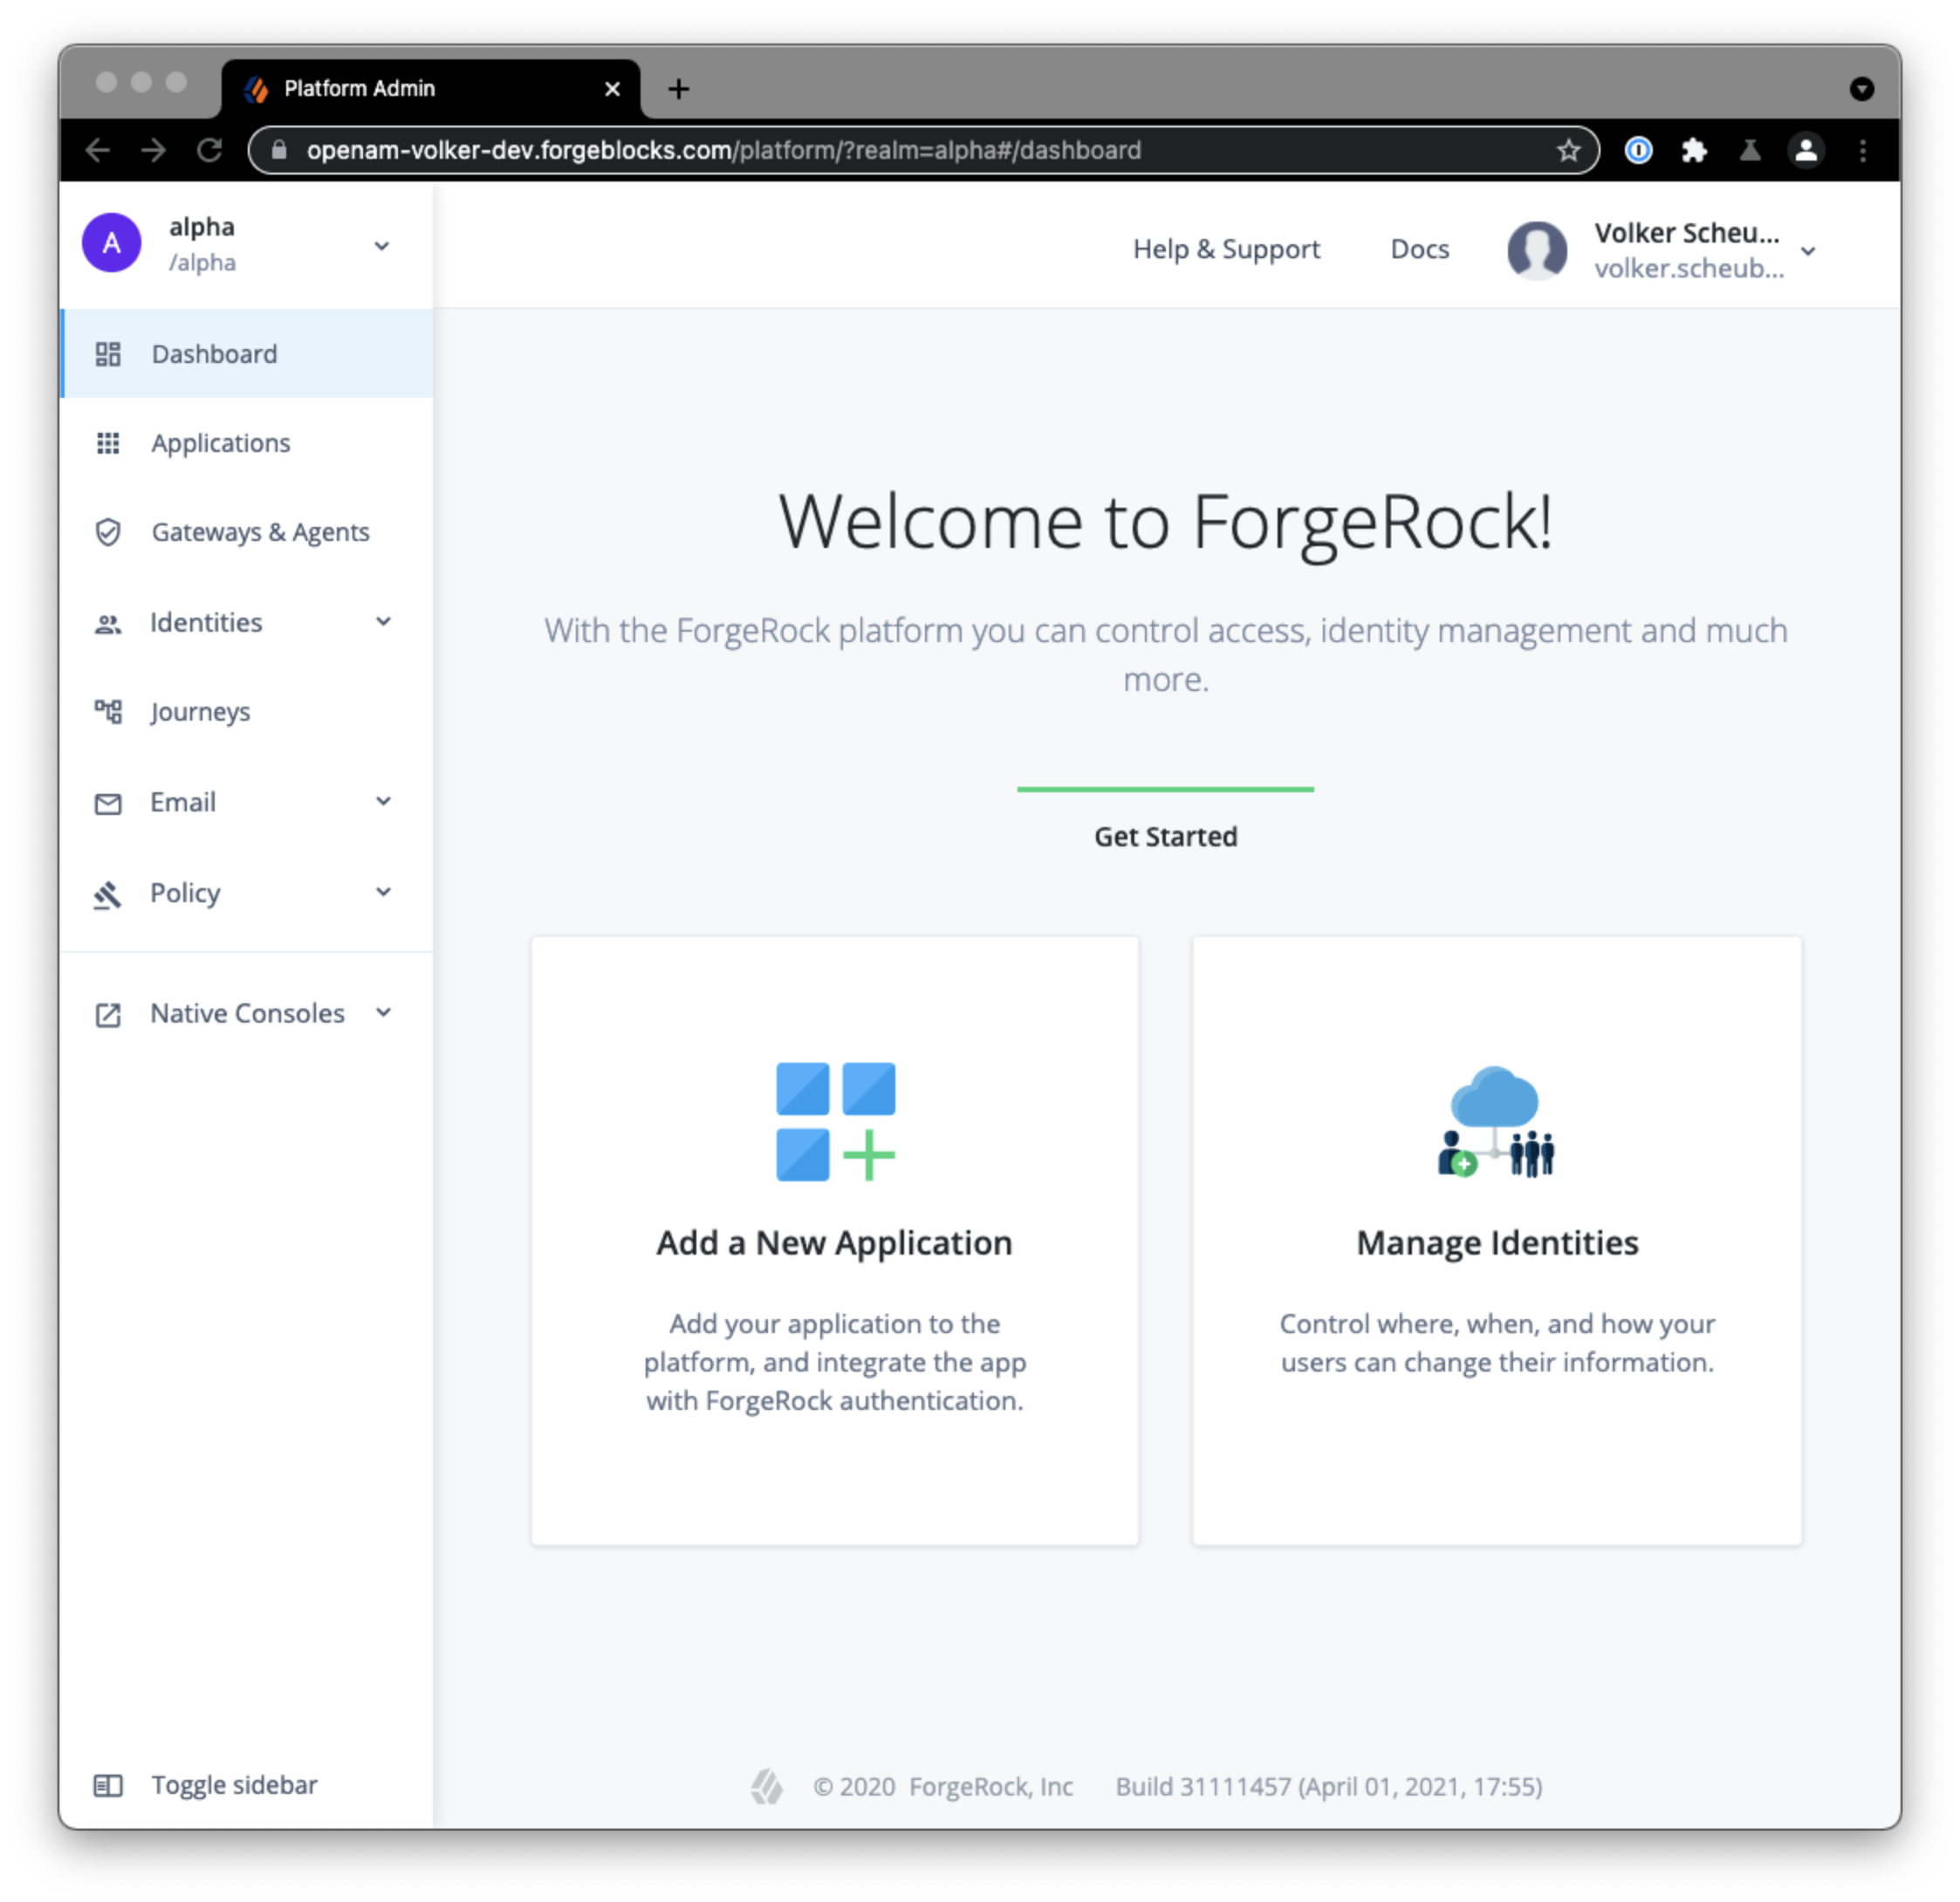 Login to your ForgeRock Identity Cloud tenant admin UI
A demo tenant admin UI URL looks like this:
https://<tenant-name>.forgeblocks.com/platform
A production tenant admin UI URL looks like this:
https://<tenant-name>.id.forgerock.io/platform
I will be using my personal tenant throughout this article:
https://openam-volker-dev.forgeblocks.com/platform
 From the left-hand navigation menu select Native Consoles > Access Management > Applications > Federation > Circles of Trust > Add Circle of Trust. Choose a name, e.g.
 AzureCOT, and description that indicate what the COT is being used for. I recommend you use it specifically for the Azure integration and create additional COTs for other integrations as you see fit. Don’t worry about any of the other fields for now.
2. Create Hosted Service Provider in ForgeRock Identity Cloud
Identity Cloud stores information about both federation parties, the service provider (its own role) and the identity provider (Azure’s role). Its own configuration is stored as a Hosted SP, which this step creates, and information about the Azure identity provider is stored as a Remote identity provider (which you will create in step 7).
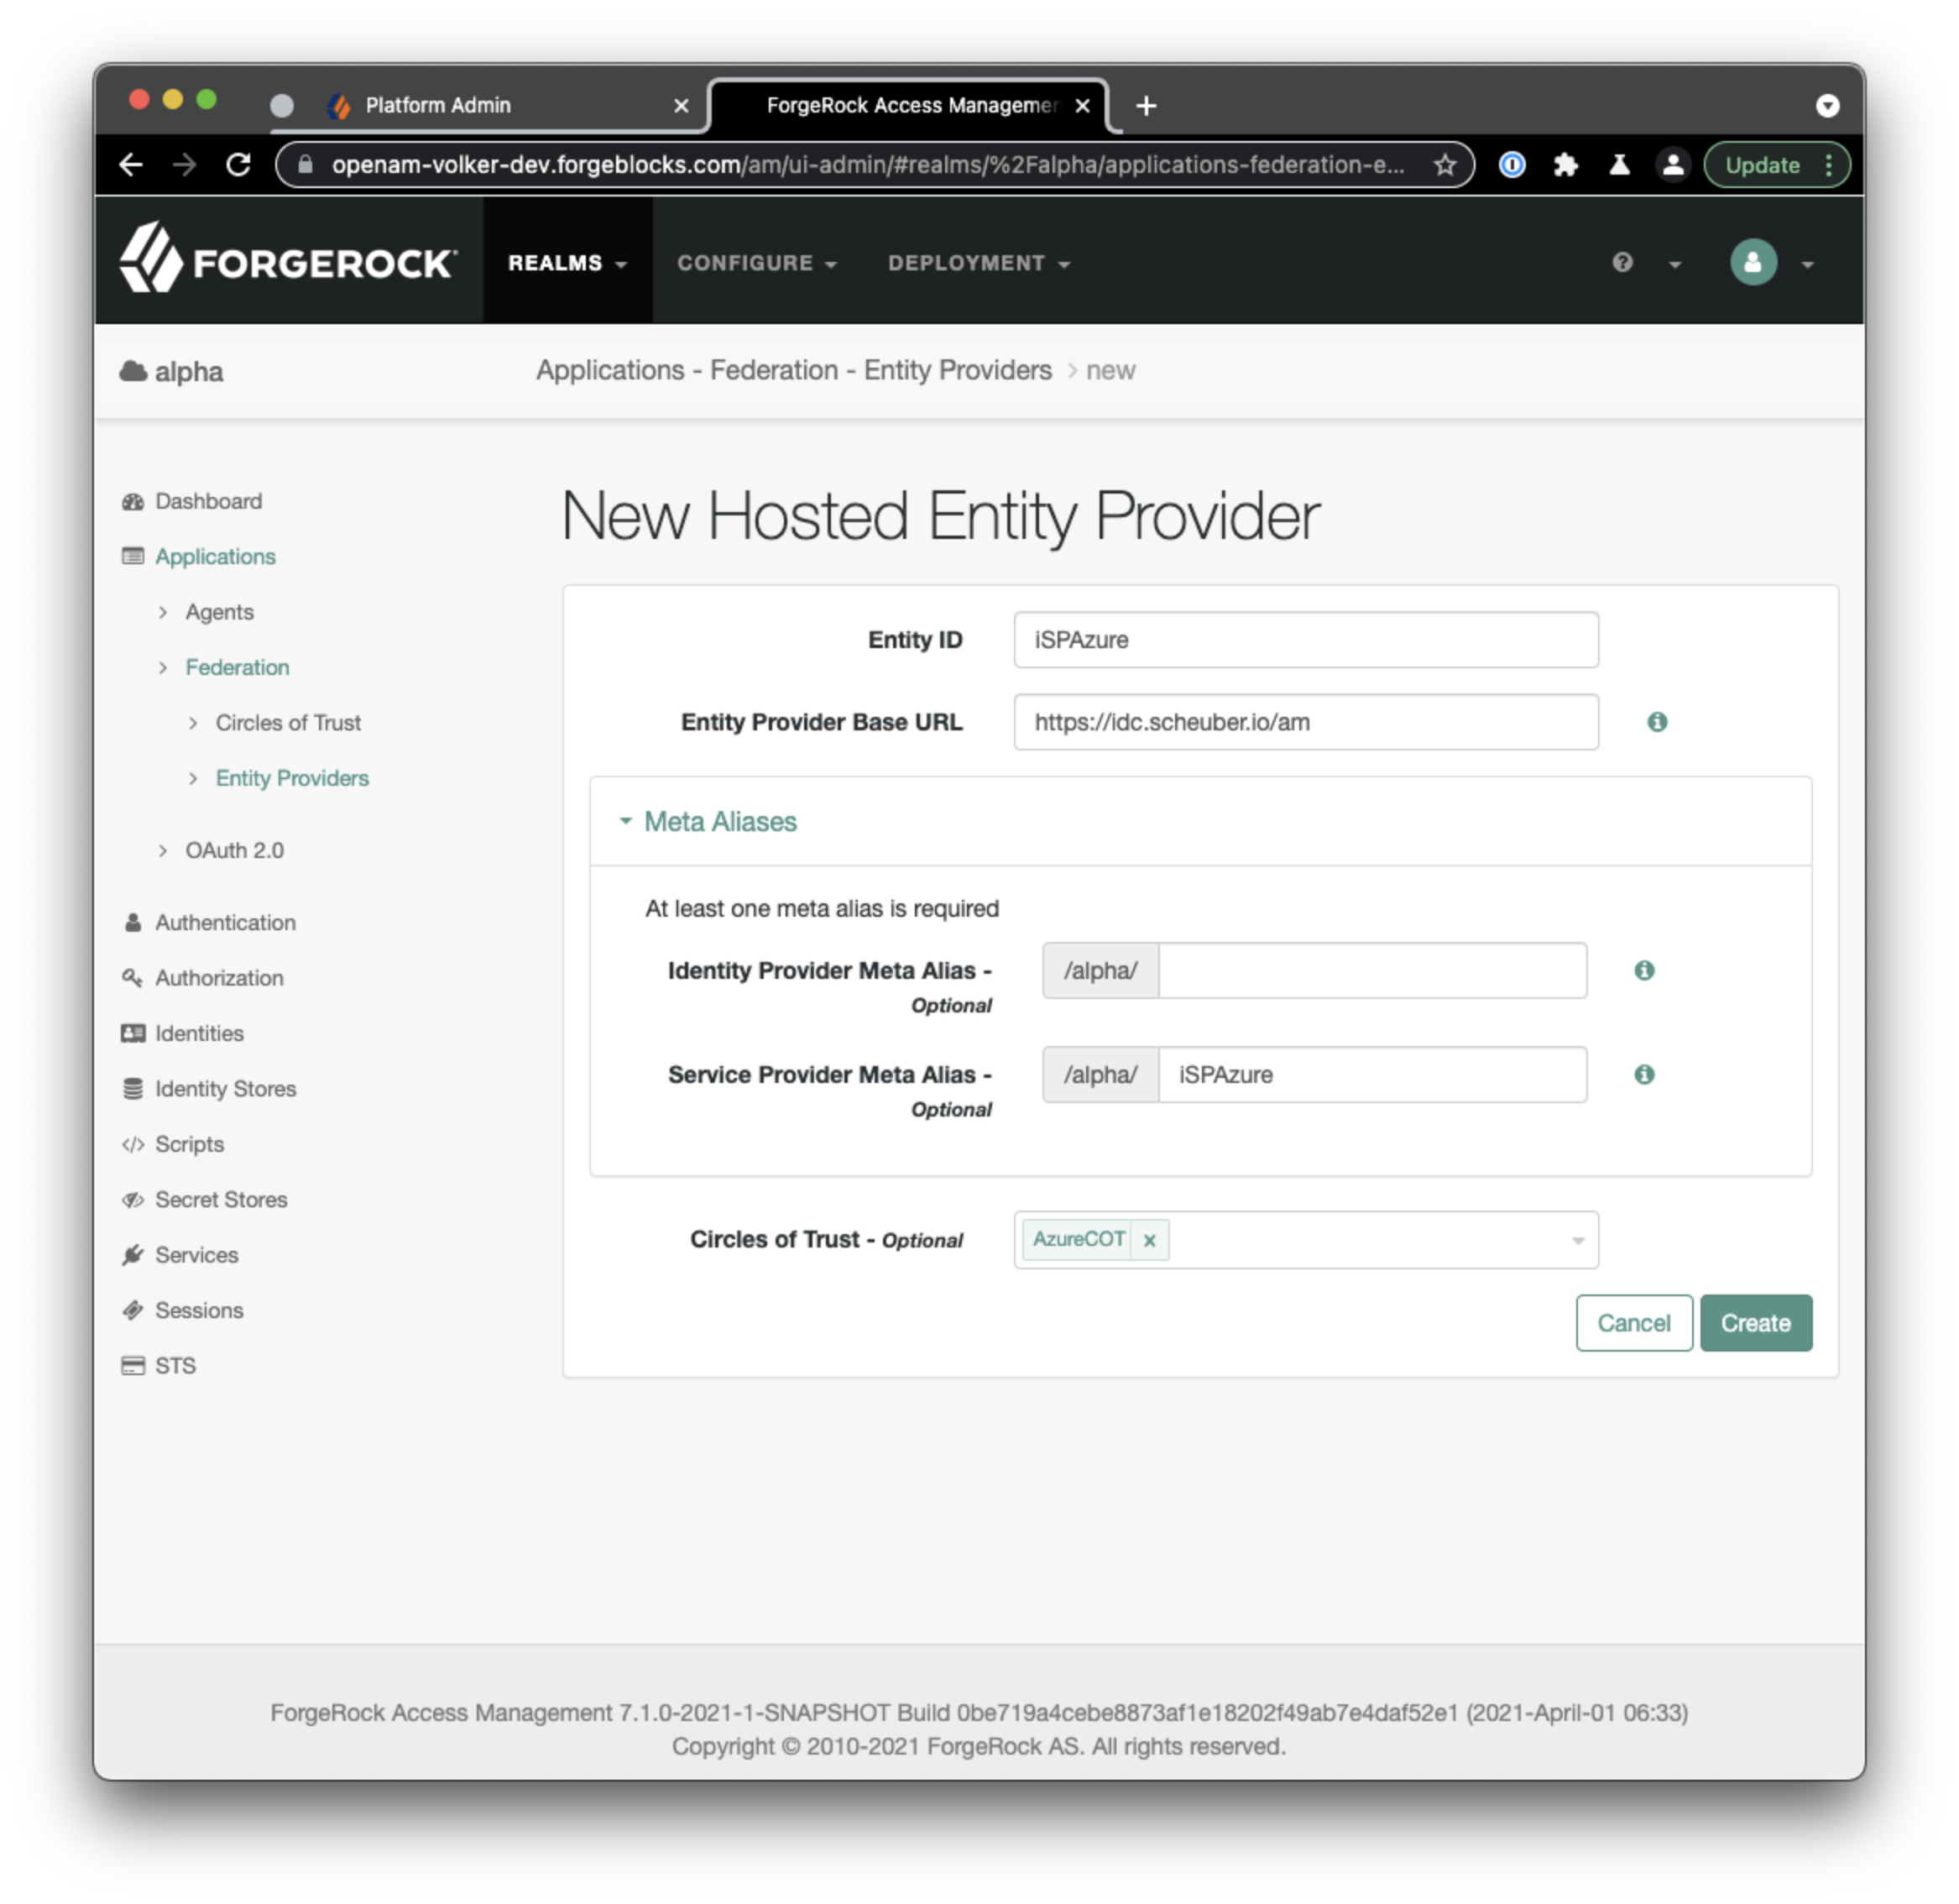 From the native access management console’s left-hand navigation menu select Applications > Federation > Entity Providers > Add Entity Provider > Hosted. Choose a short and descriptive value for the Entity ID, e.g.
 iSPAzure.
Be mindful of the Entity Provider Base URL field. It is pre-populated with a valid default value but you may want to consider changing it, if your ID Cloud realm is configured with a custom DNS name and you want users to access your tenant using that custom DNS name. I have a custom DNS name configured for the alpha realm in my tenant and thus I change the Entity Provider Base URL to reflect that custom DNS name. What you enter here affects the user experience, as the URL is visible to the end user during the SAML flow.
Leave the Identity Provider Meta Alias field empty to avoid creating a hosted IDP.
Choose a value for the Service Provider Meta Alias field. I recommend to use the entity id (unless you decided to use a URL-style value as your entity id, then you will want to chose some other unique string value).
Select the circle of trust you created in step 1 as the value (or one of the values) for the Circles of Trust field.
Once you created the entity provider, there are a number of additional configuration steps to take:
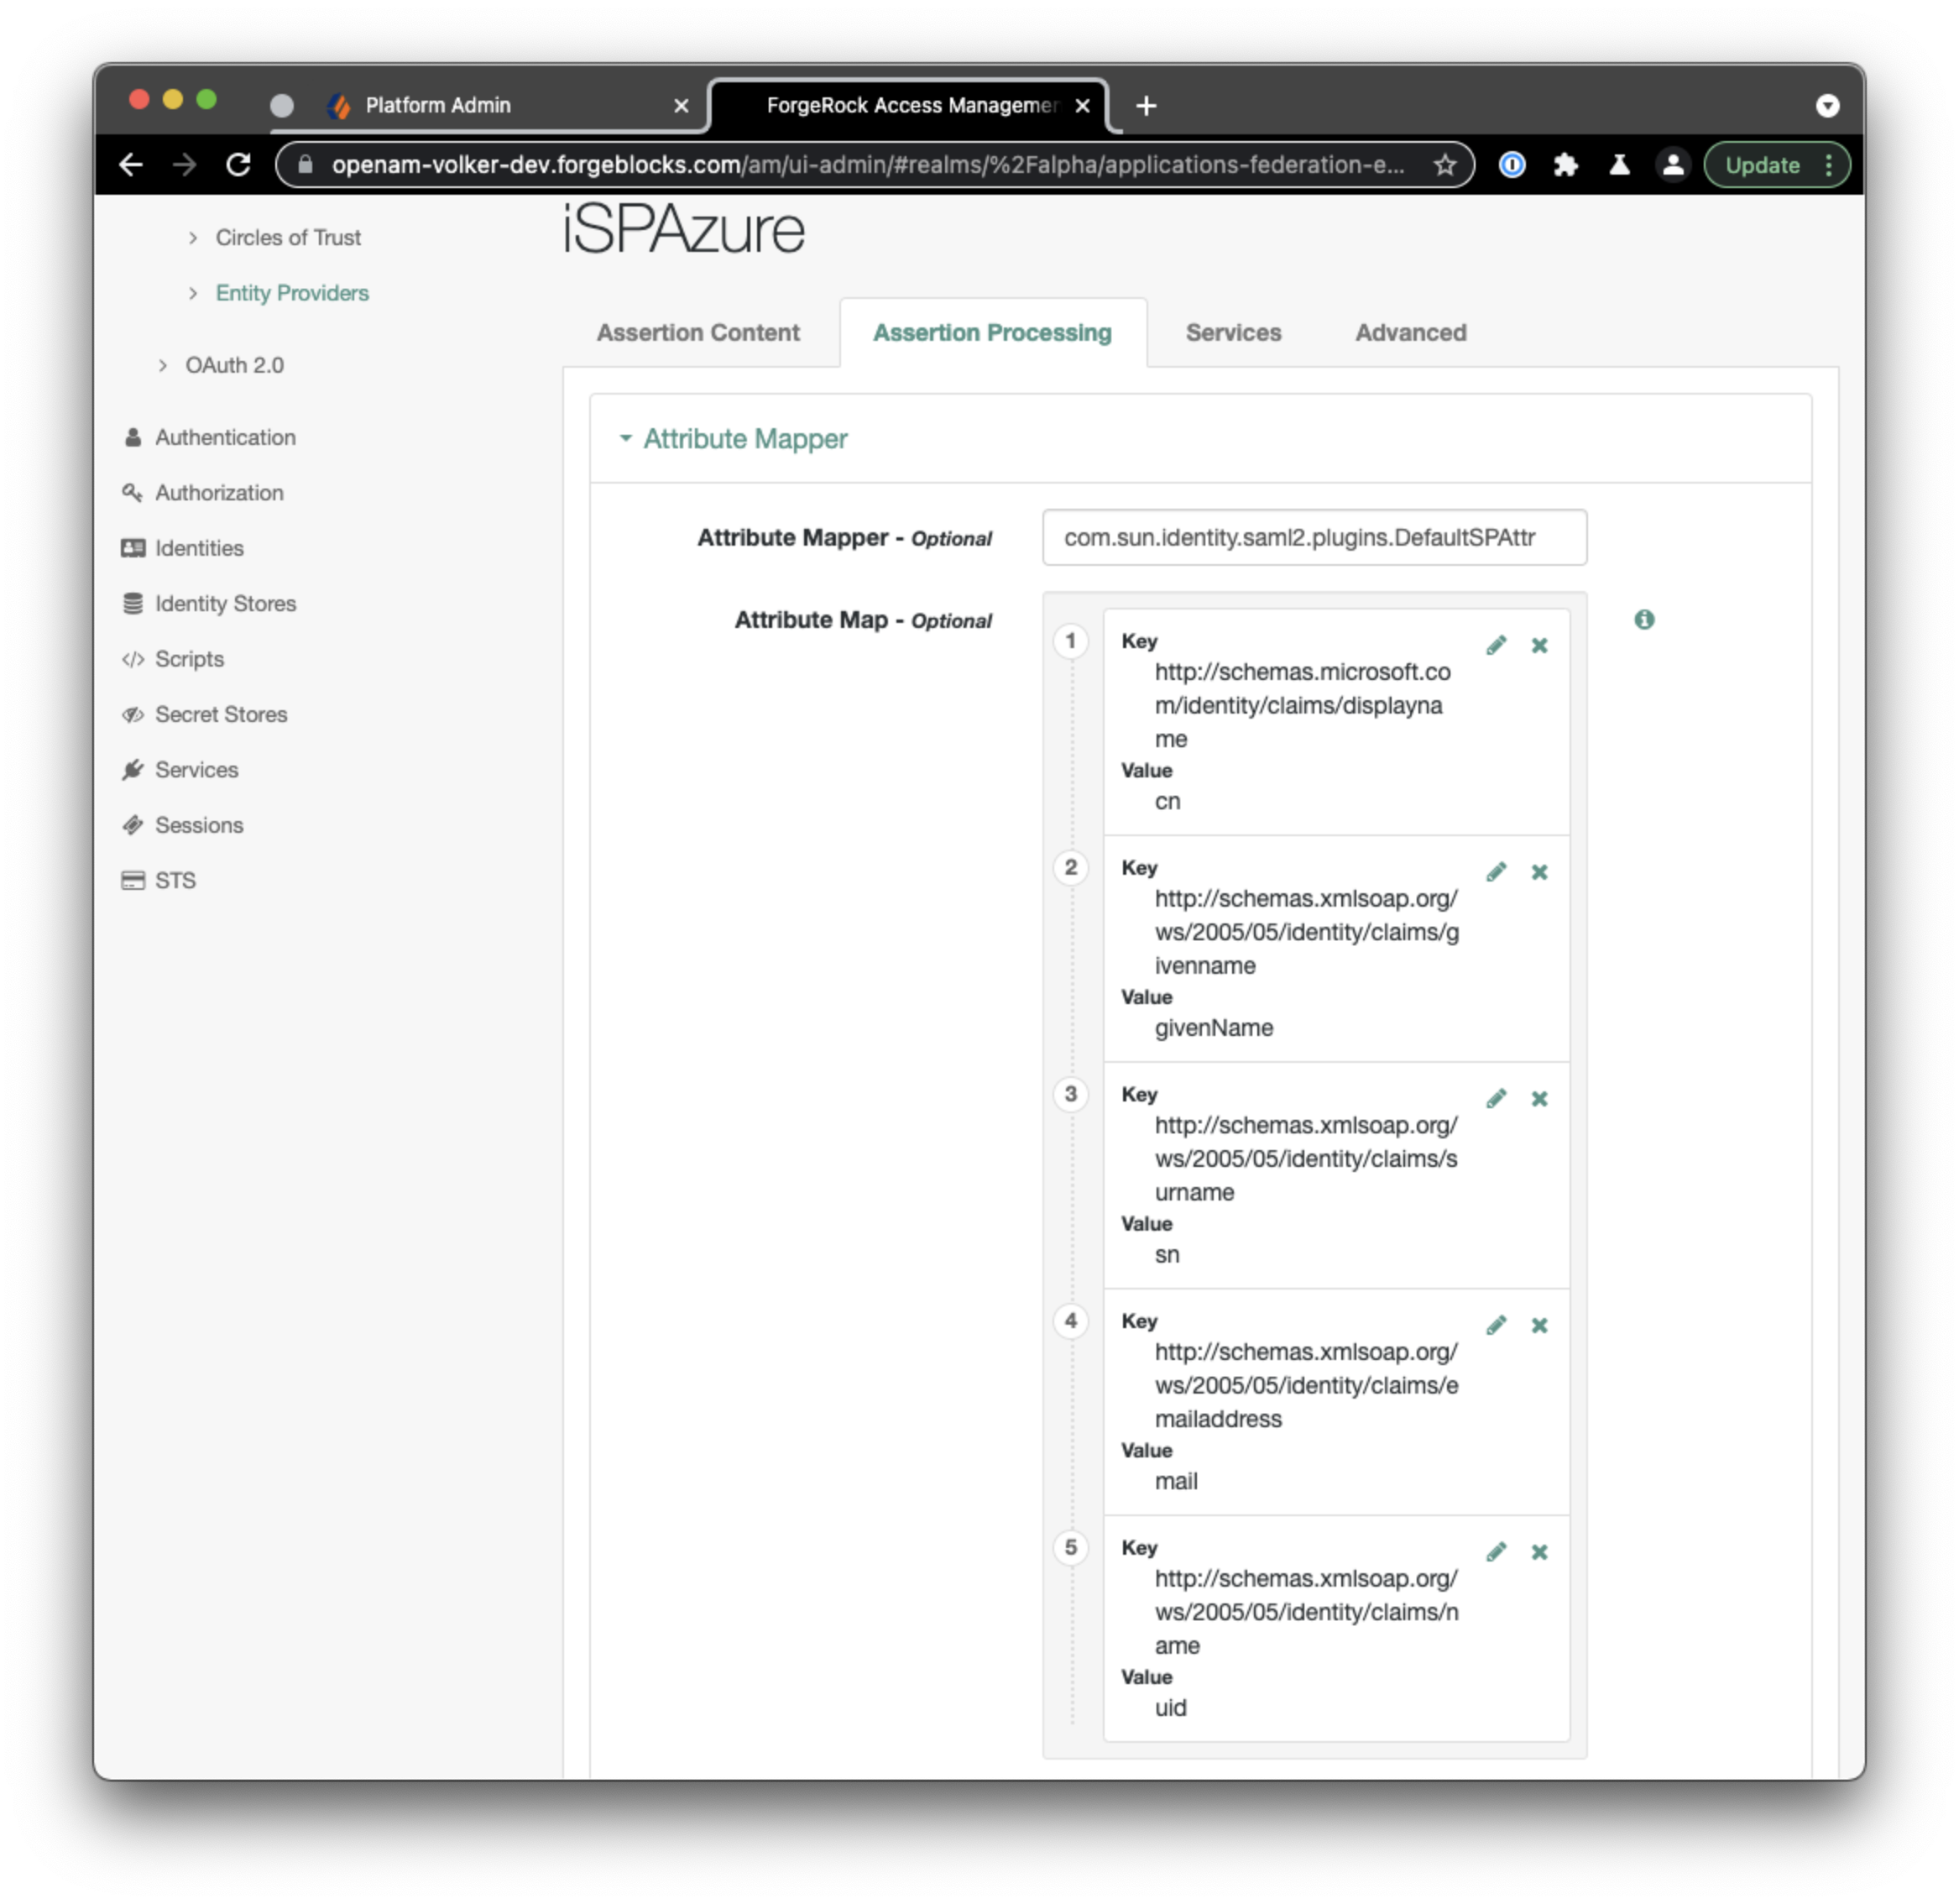 On the Assertion Processing tab, modify the Attribute Mapper to contain the following mappings in the Attribute Map. These mappings will work with the default settings in an Azure Enterprise Application. Add any additional mappings as you see fit. The map determines how you will be able to refer to attributes in the assertion to create or update user profiles in ID Cloud.
| Key | Value |
| http://schemas.microsoft.com/identity/claims/displayname | cn |
| http://schemas.xmlsoap.org/ws/2005/05/identity/claims/givenname | givenName |
| http://schemas.xmlsoap.org/ws/2005/05/identity/claims/surname | sn |
| http://schemas.xmlsoap.org/ws/2005/05/identity/claims/emailaddress | |
| http://schemas.xmlsoap.org/ws/2005/05/identity/claims/name | uid |
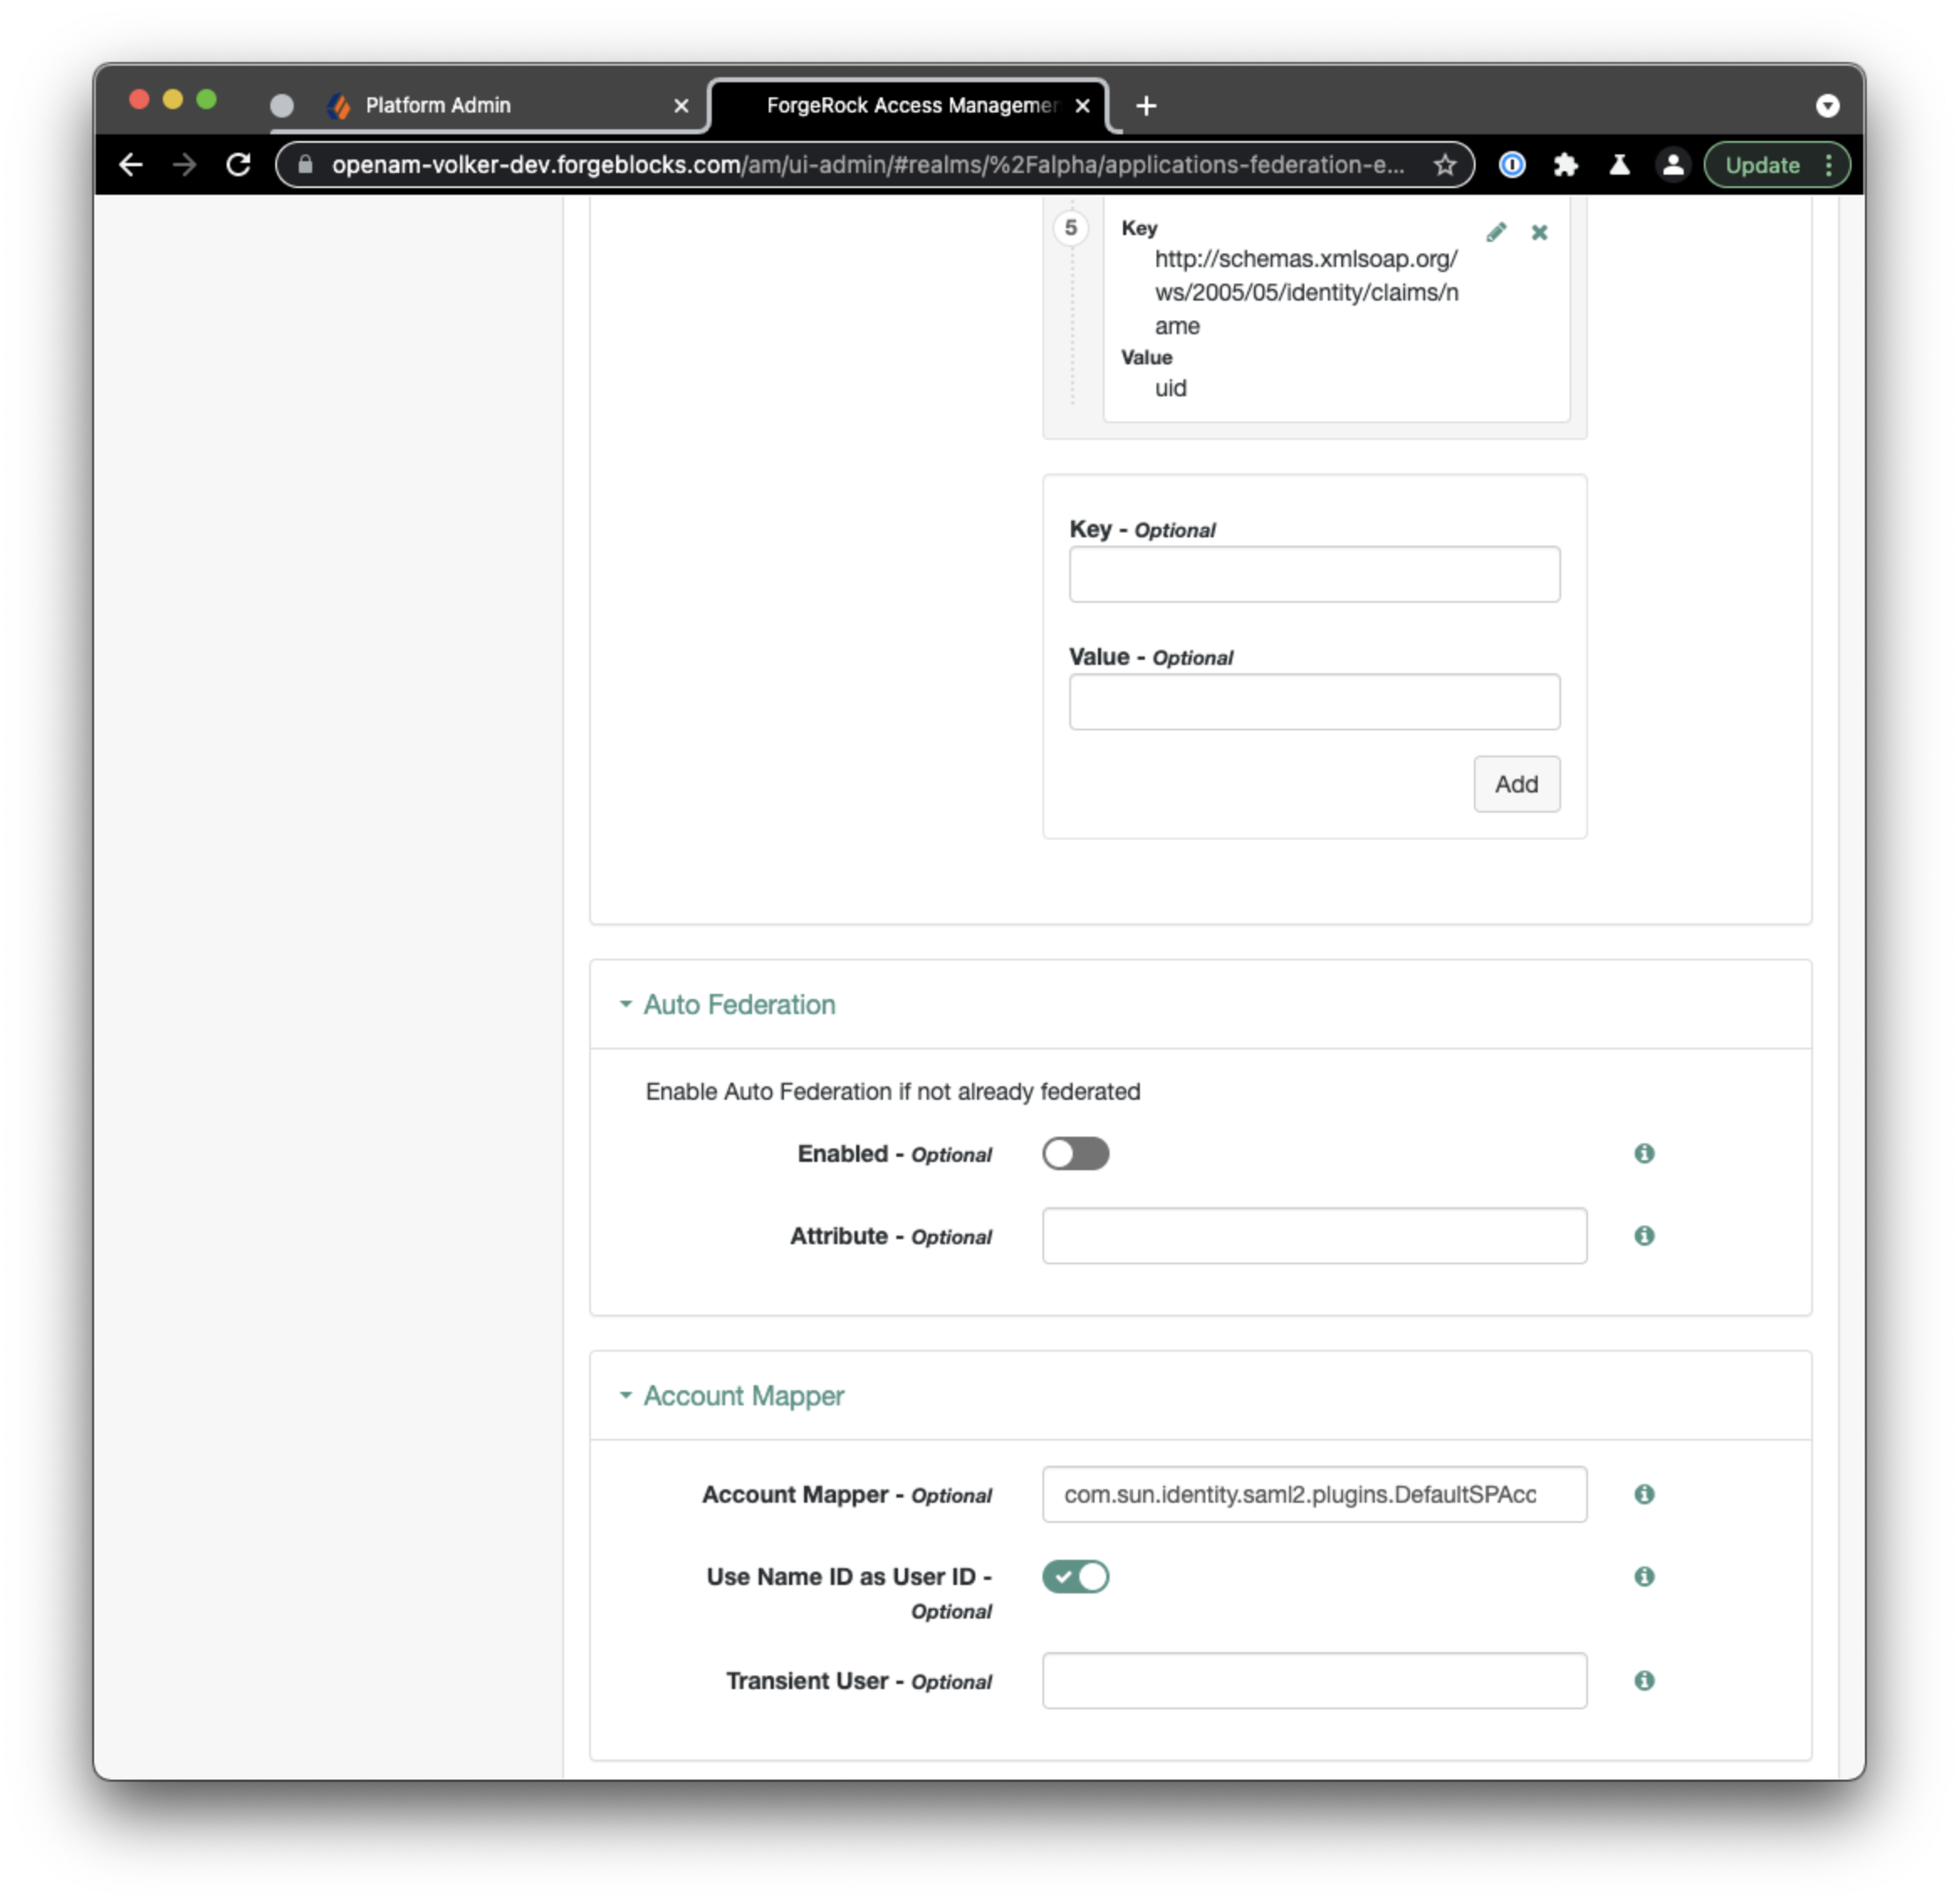 On that same Assertion Processing tab, scroll down to the Account Mapper section and enable the option Use Name ID as User ID. This instructs ID Cloud to set the username to the value of the Name ID in the assertion. However, if you change what Azure puts into the Name ID, you may want to uncheck this option, as it affects the behavior of the authentication journey in step 8.
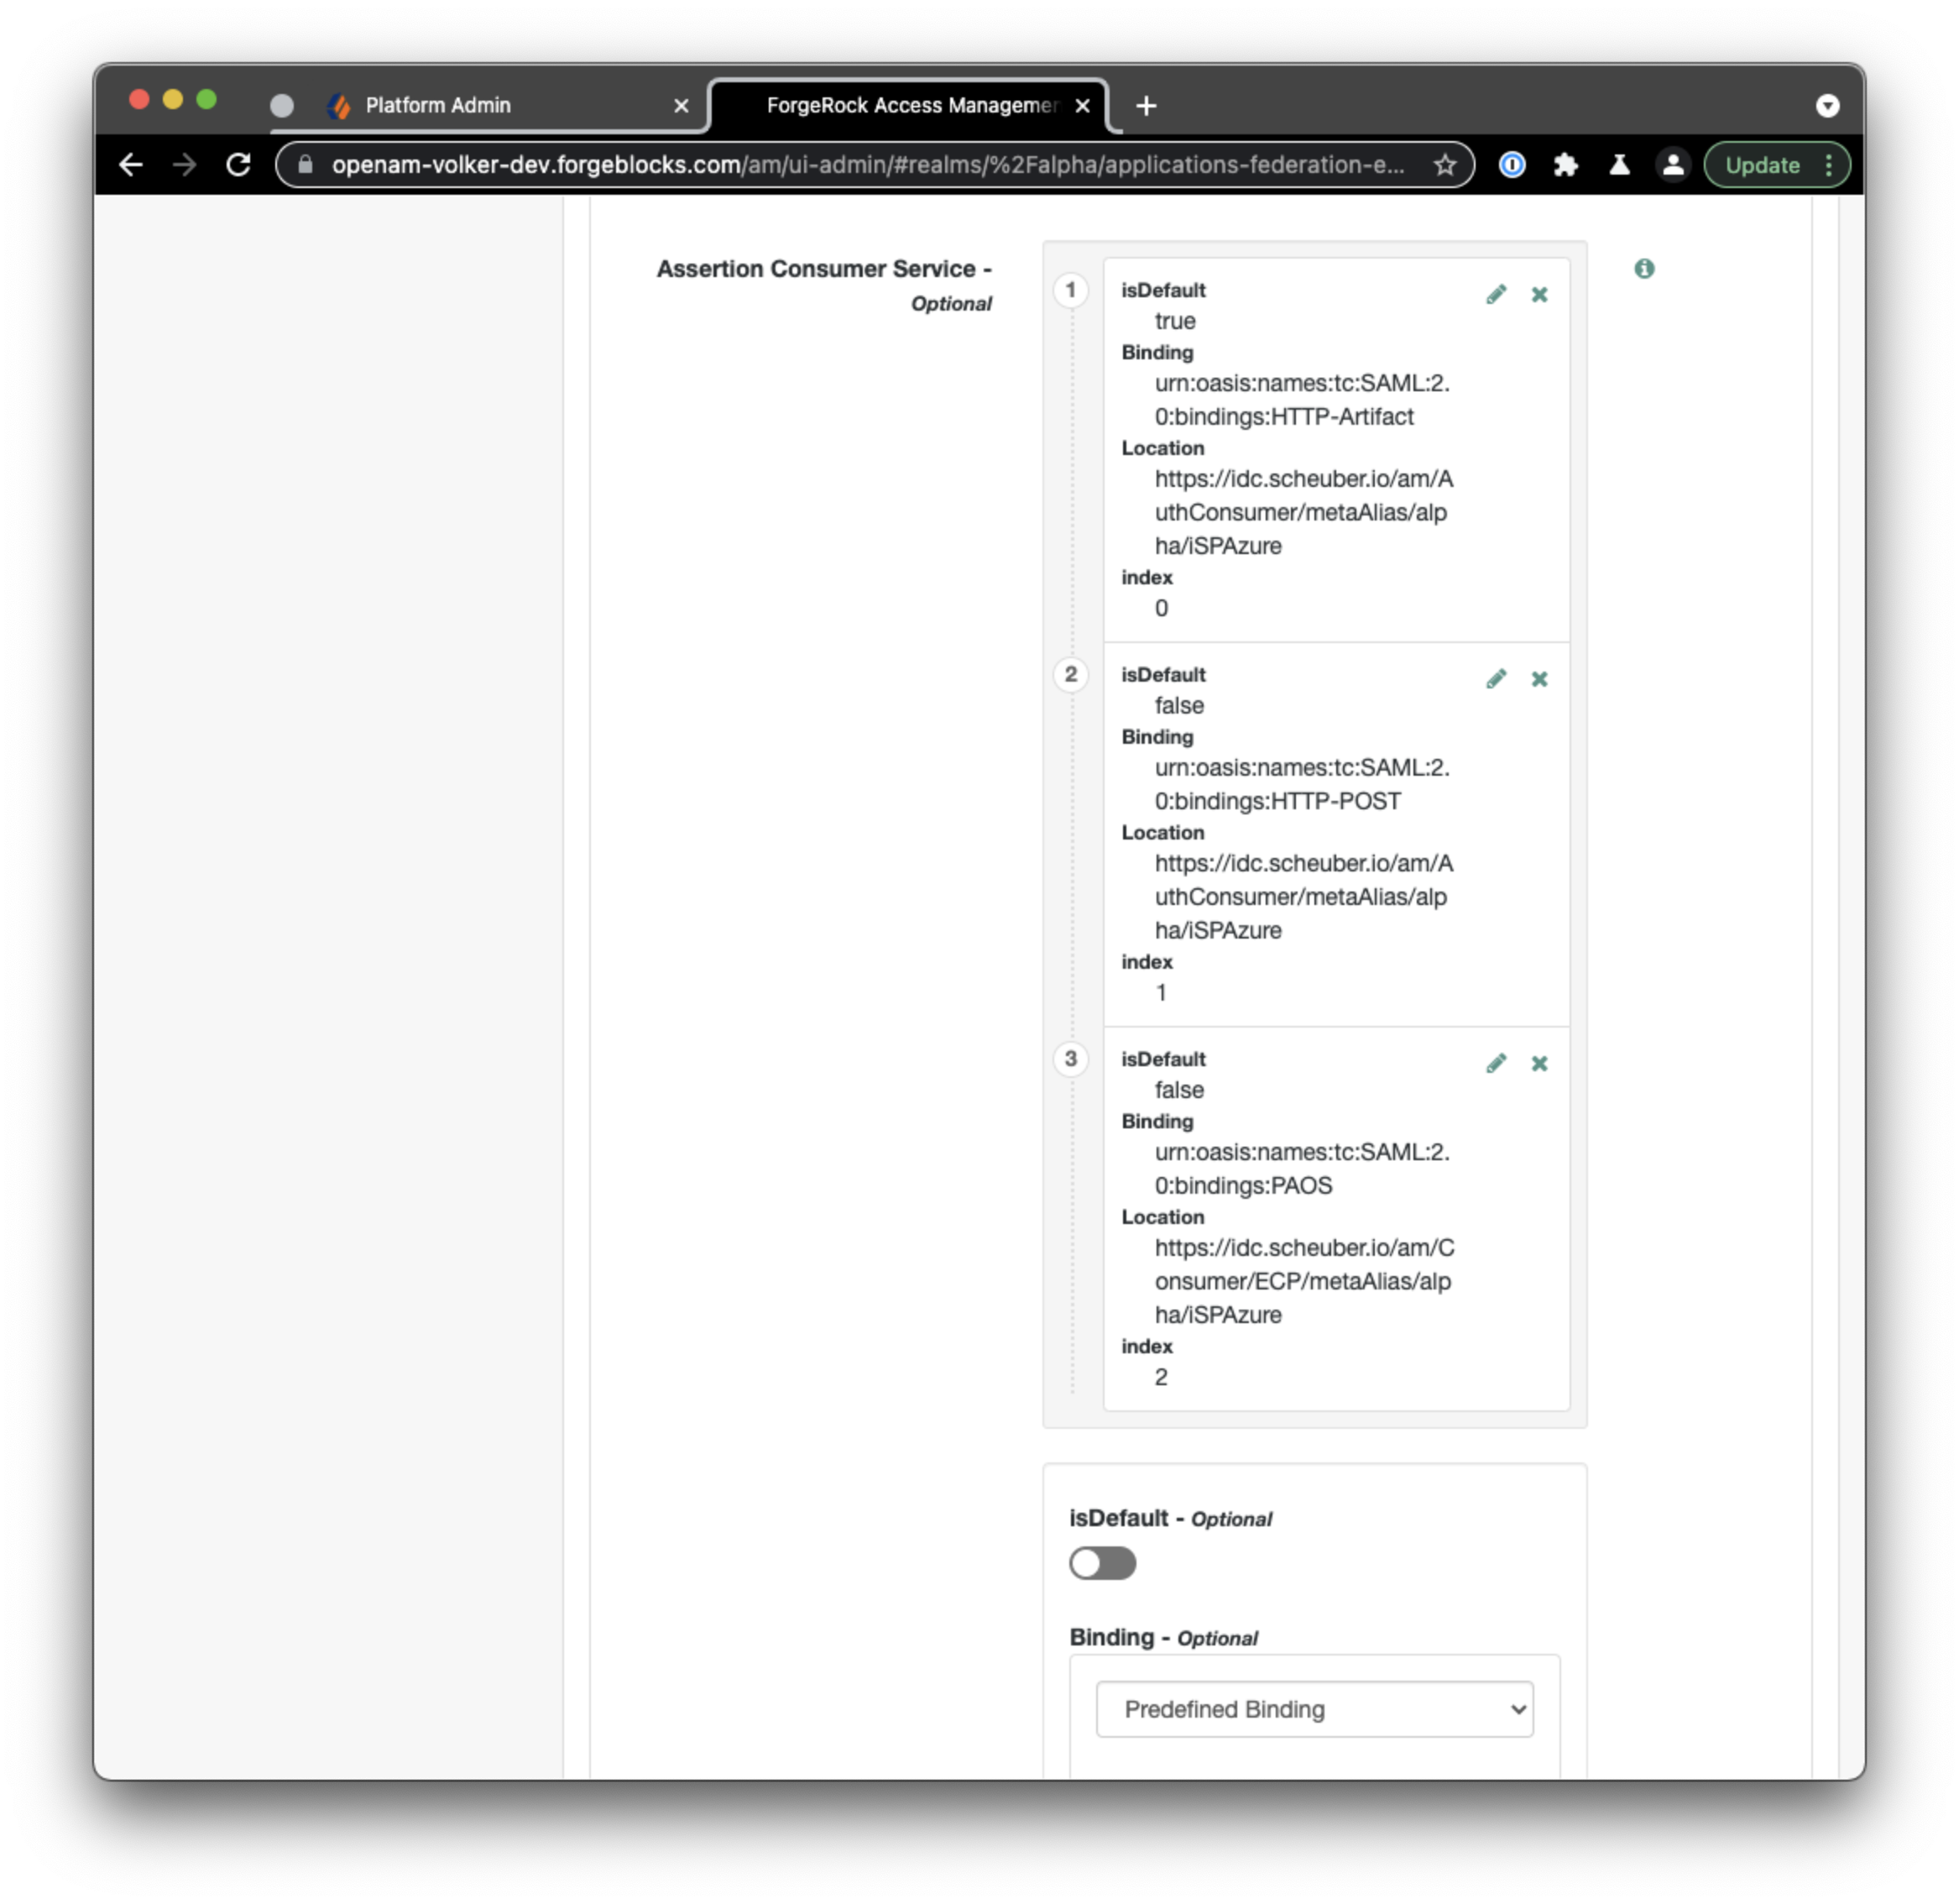 To enable integrated mode, select the Services tab, scroll down to the Assertion Consumer Service section and make the following changes: Identify the HTTP-Artifact and the HTTP-POST bindings and modify their respective Location fields. Change the default
 .../Consumer/... part of the URL to .../AuthConsumer/.... This enables integrated mode, which means that ID Cloud will, after validating the assertion and completing the official SAML business, return control back to the authentication journey (step 8), which started the flow and continue where it left off, after the SAML node.
3. Export metadata from ForgeRock Identity Cloud
Identity Cloud exposes its SAML2 metadata through a URL you can access from your browser to “Save Page As…” or use a command line tool like wget or curl to obtain the metadata XML and store it as an XML file.
Metadata URL format:
[TenantURL]/am/saml2/jsp/exportmetadata.jsp?entityid=[EntityID]&realm=/[RealmName]
Where:
[TenantURL]is your default tenant URL or the custom DNS name, e.g.https://openam-volker-dev.forgeblocks.comorhttps://idc.scheuber.ioin my case.[EntityID]is the name your hosted service provider you chose in step 2, e.g.iSPAzure.[RealmName]is the name of the realm hosting your service provider, e.g.alpha.
Metadata URL using my default tenant name:
https://openam-volker-dev.forgeblocks.com/am/saml2/jsp/exportmetadata.jsp?entityid=iSPAzure&realm=/alpha
Metadata URL using my custom DNS name:
https://idc.scheuber.io/am/saml2/jsp/exportmetadata.jsp?entityid=iSPAzure&realm=/alpha
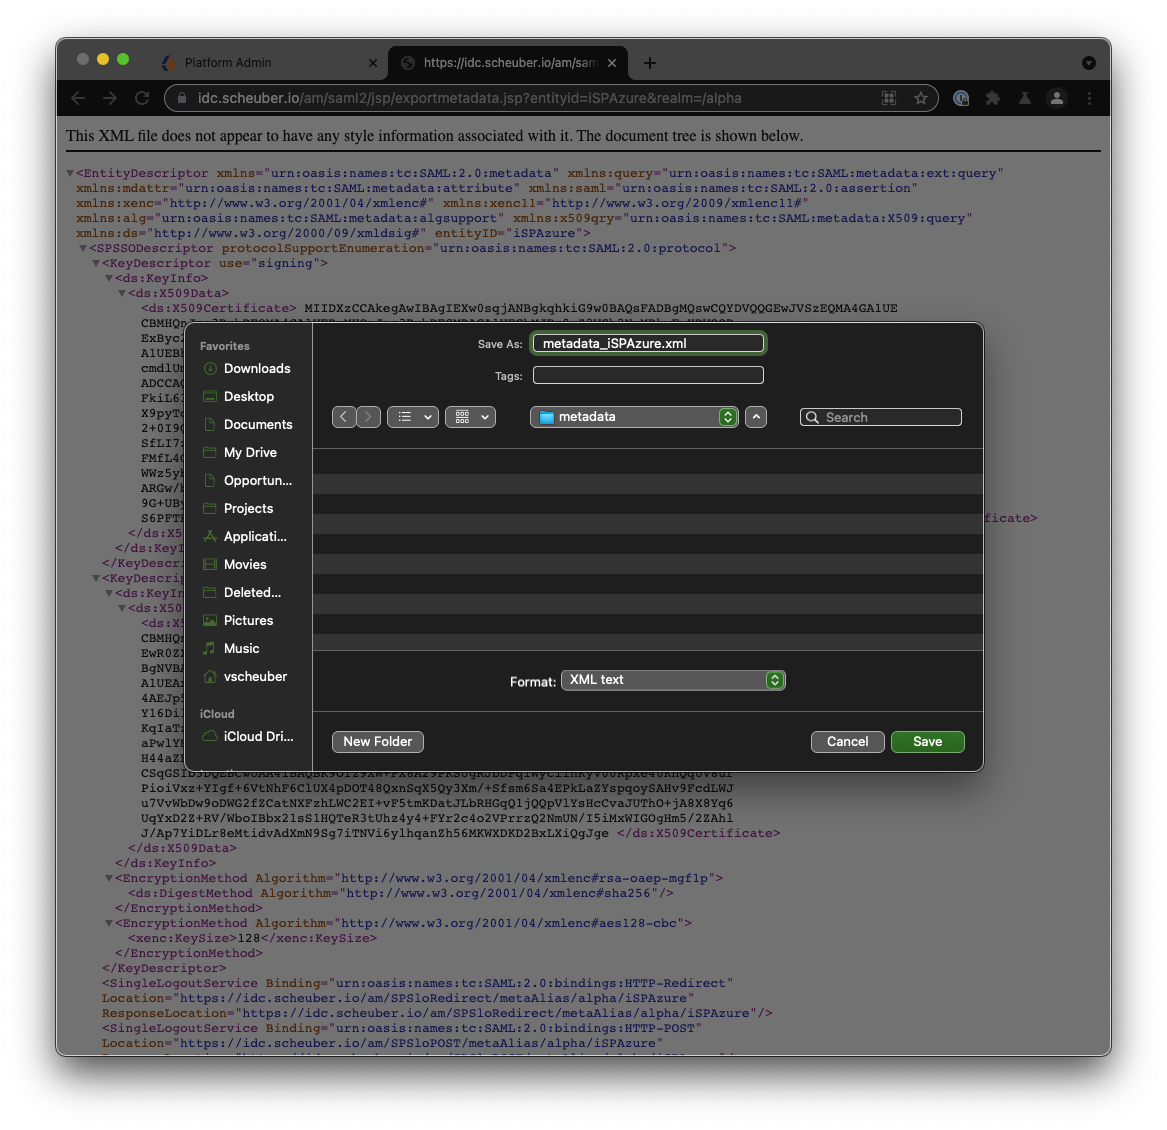 Point your browser to the metadata URL you composed following the guidelines above, then do a “Save Page As…” and save the metadata as metadata_iSPAzure.xml. Keep this file handy, as you will need it to configure the Azure side of the integration. Alternatively to using your browser, you could use a command like:
$ curl --output metadata_iSPAzure.xml "https://idc.scheuber.io/am/saml2/jsp/exportmetadata.jsp?entityid=iSPAzure&realm=/alpha"
4. Create enterprise application in Azure AD
Azure lets you create enterprise applications for the purpose of storing single sign-on configuration for an application or service you want to integrate with Azure.
 Login to your Azure Active Directory administration portal at https://aad.portal.azure.com, select Enterprise applications from the left navigation menu. From the enterprise applications page, select New Application, then Create your own application, pick a name and select the bottom option Integrate any other application you don’t find in the gallery (Non-gallery), then select Create.
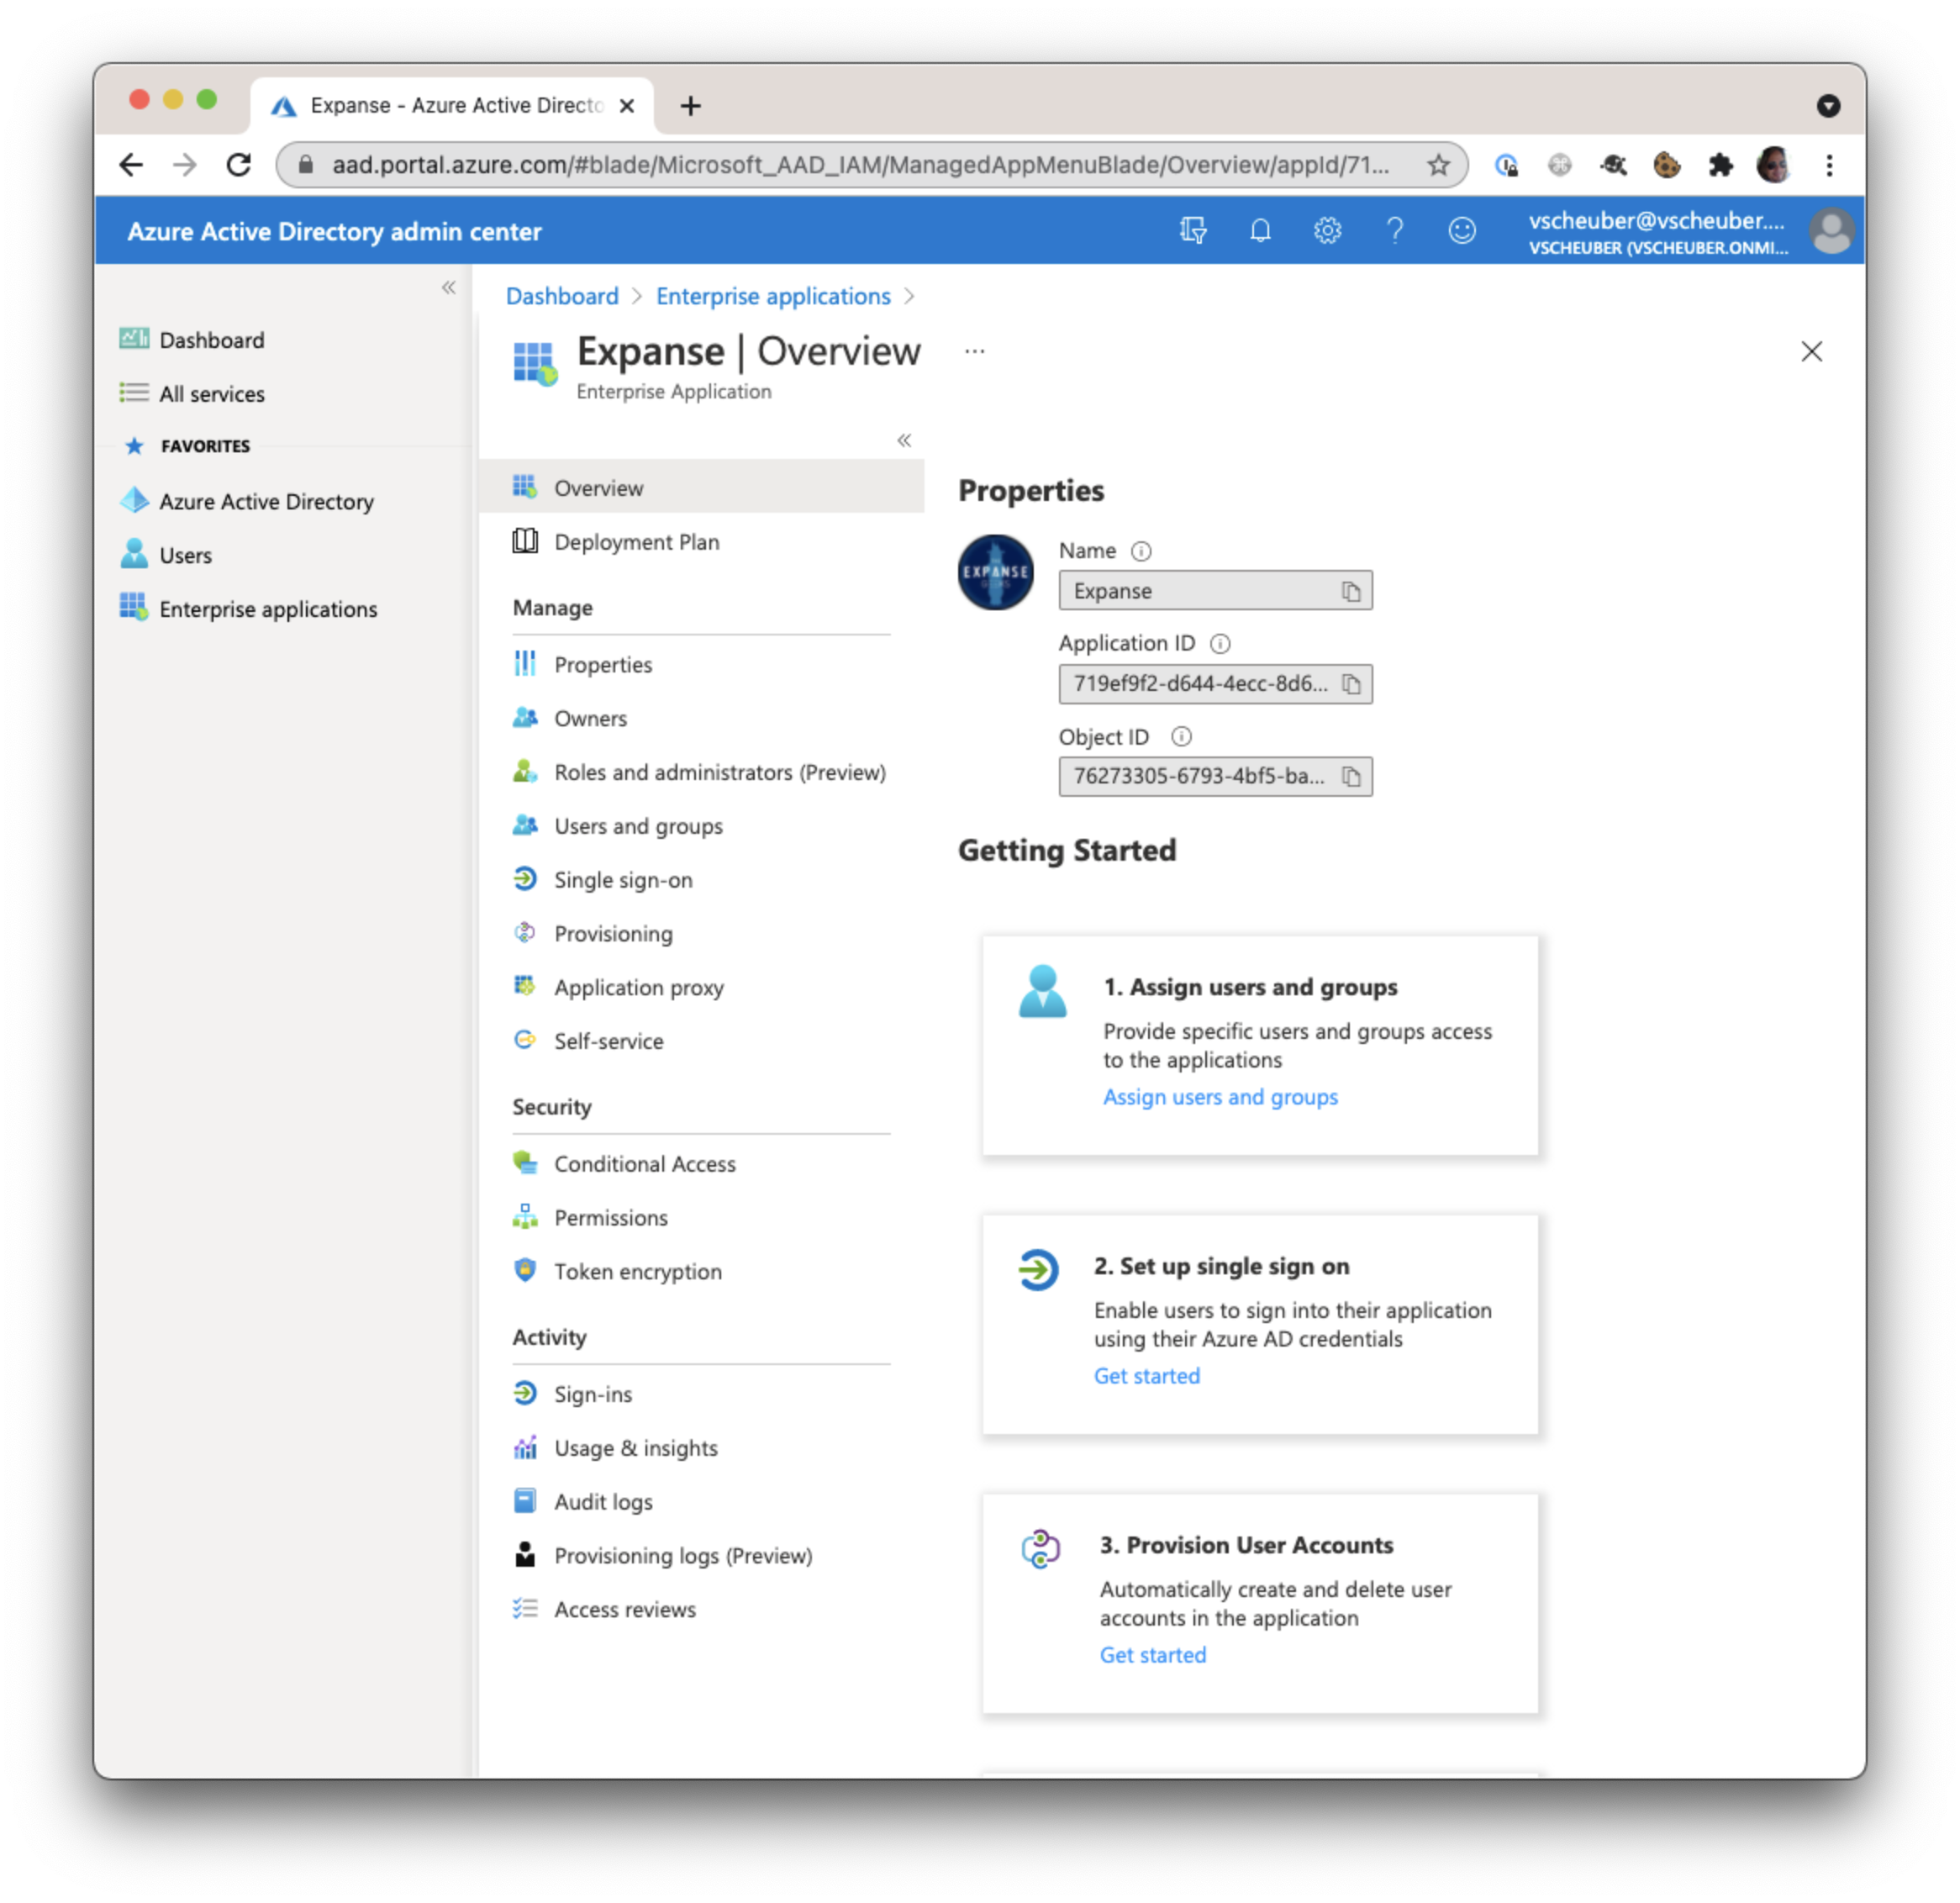 From the Overview page of your new enterprise application, configure the basics: Select a nice icon for your application, and more importantly, assign users and groups. Enterprise applications will only show for users who have been assigned either directly or indirectly through a group. Once these basic necessities are taken care of, you can configure single sign-on.
5. Upload ForgeRock metadata into enterprise application and configure IDP settings
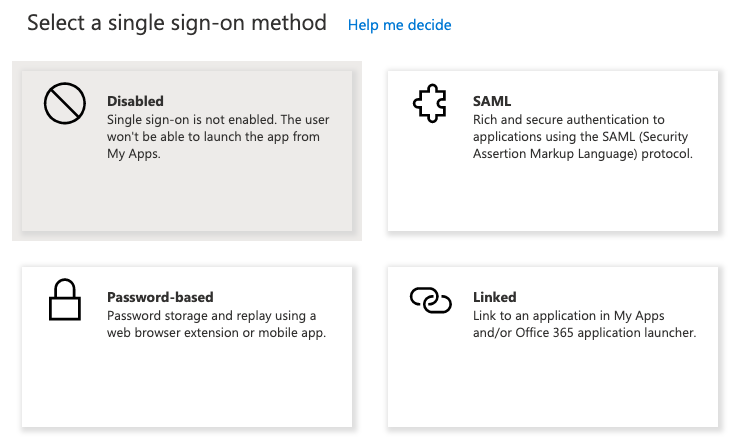 From the Overview page of your new enterprise application or from the left navigation menu select Single sign-on. Choose SAML, then Upload metadata file and upload the file you exported from Identity Cloud,
 metadata_iSPAzure.xml. This will configure most of the required settings to make single sign-on (SSO) work and land you on the Basic SAML Configuration page.
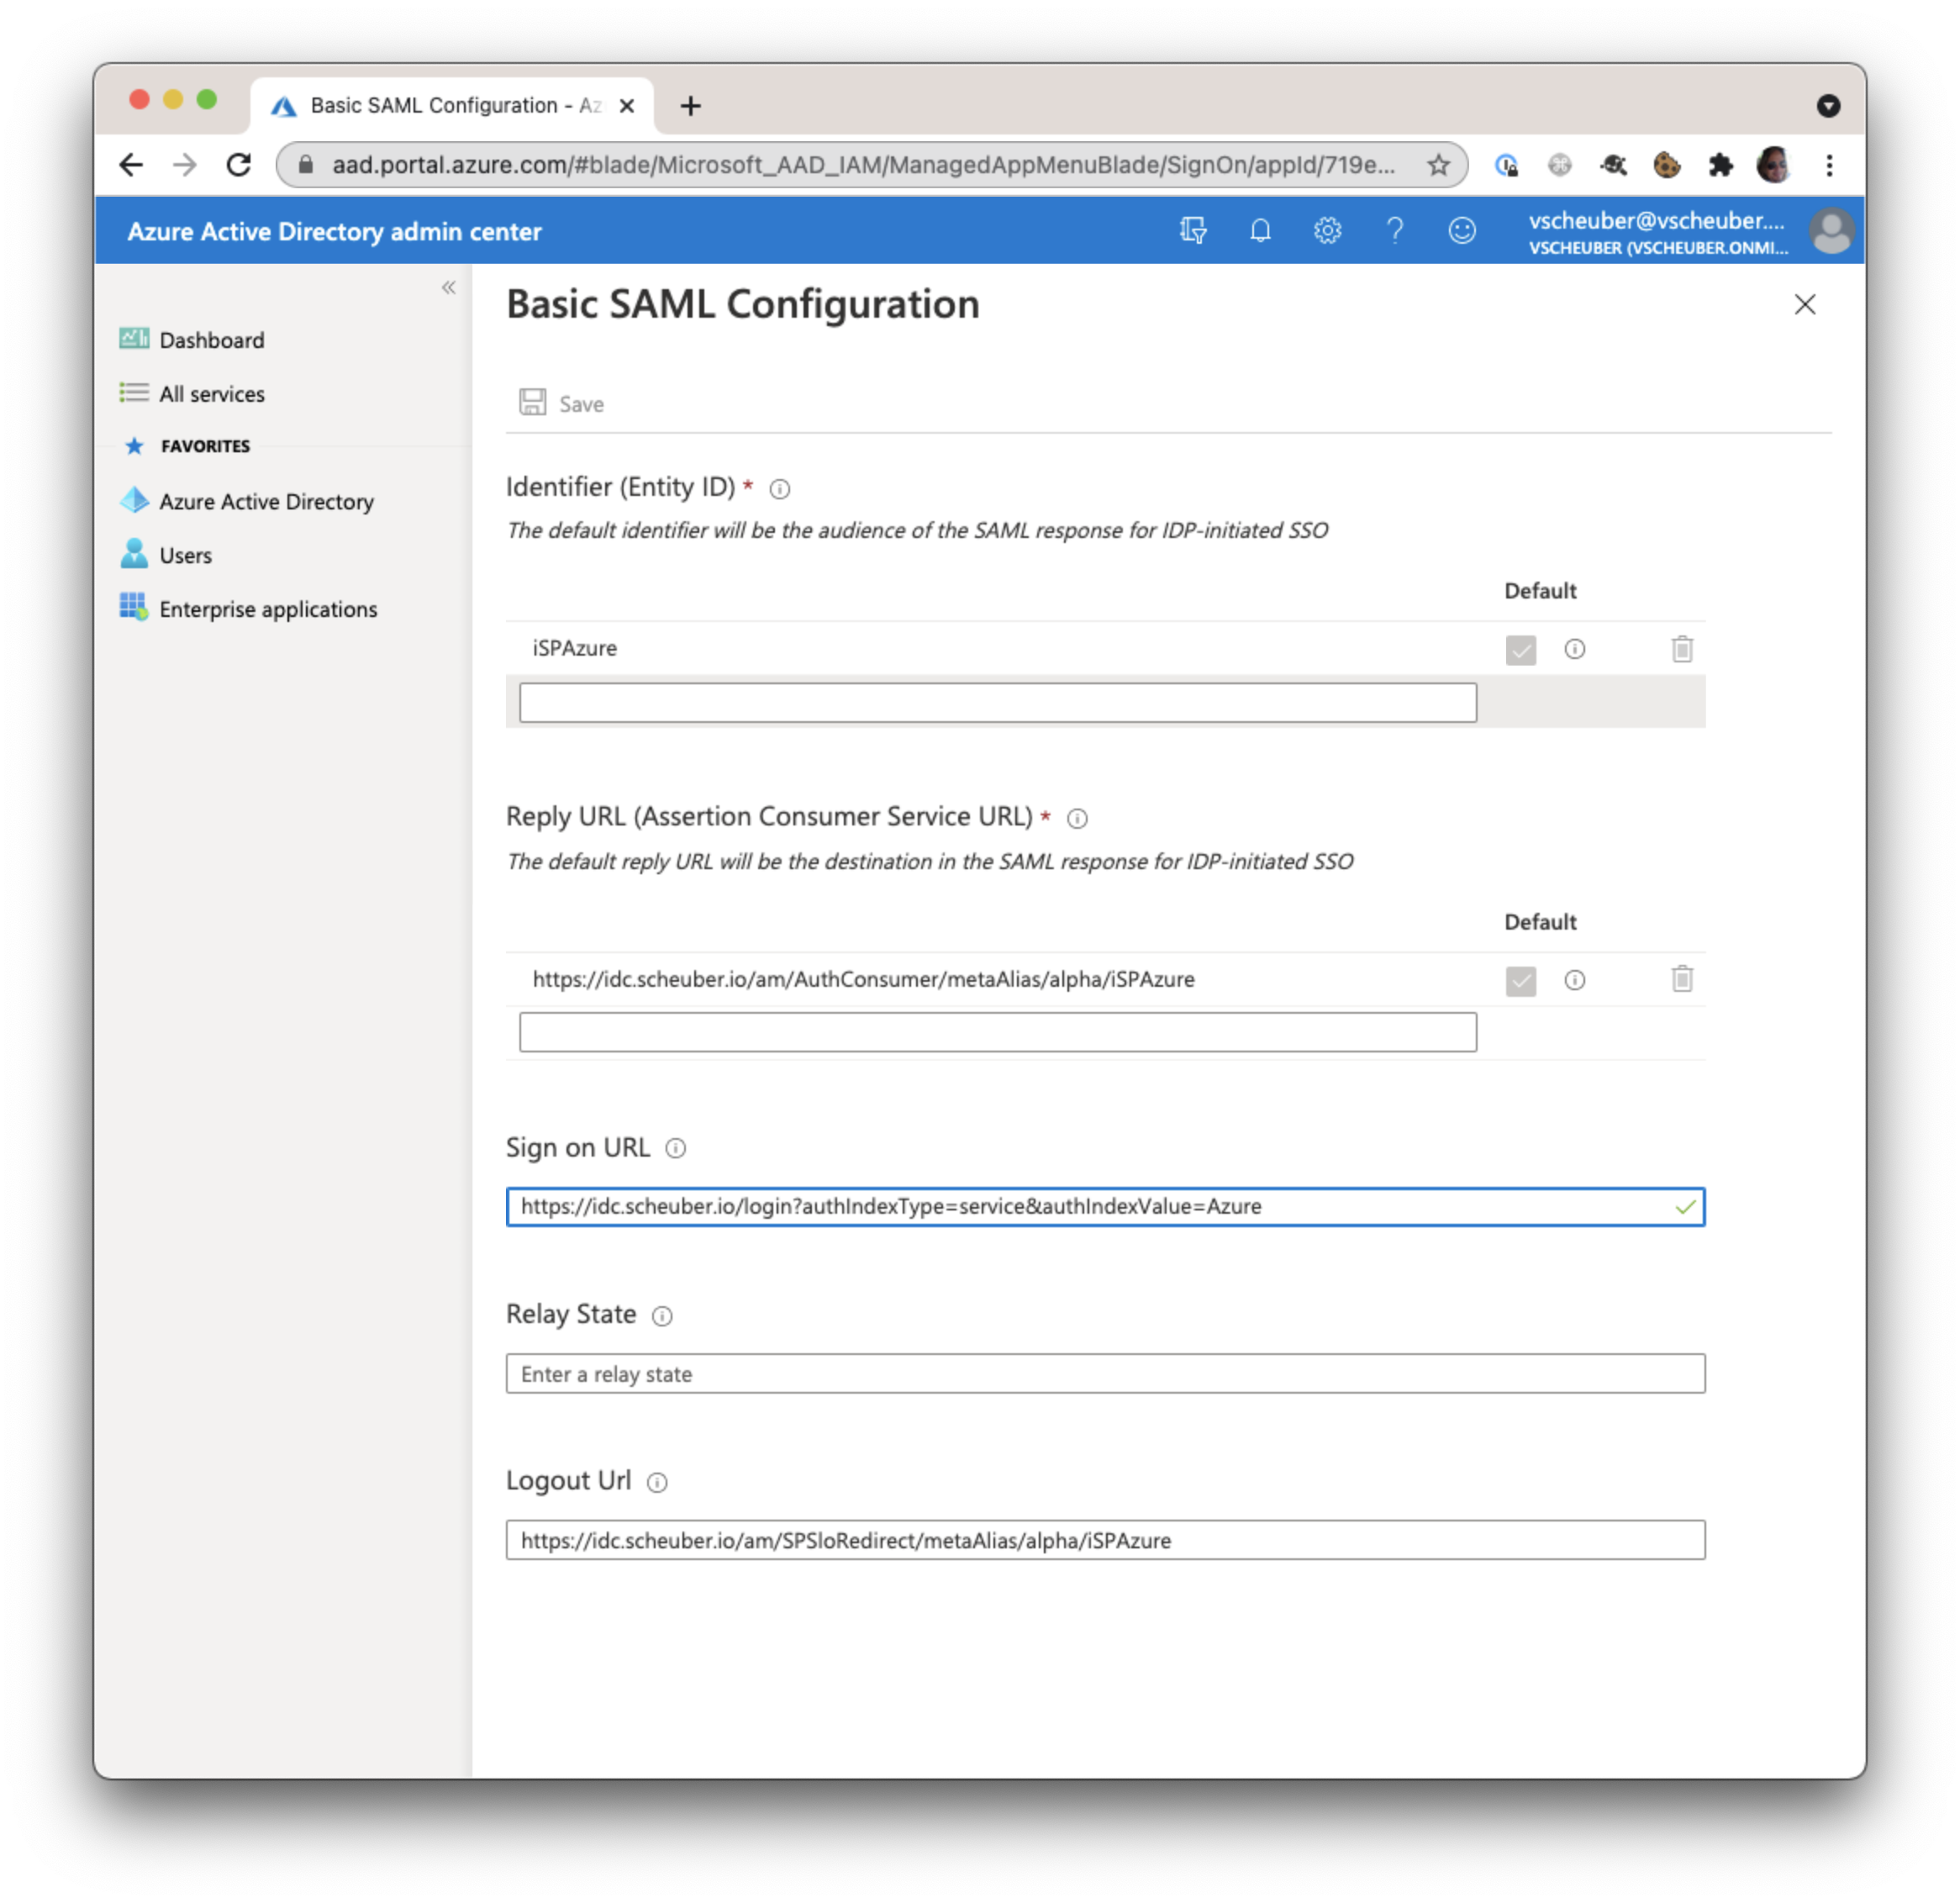 The only setting you need to concern yourself with for now is the Sign on URL. This is the URL the user is sent to when selecting the application from their My Apps portal. Here you will enter a URL of the following format:
[TenantURL]/login?authIndexType=service&authIndexValue=[Journey]
The [TenantURL] is the same as you used in previous steps and the [Journey] you can pick any name and use that name in step 8. I named mine Azure. The Journey is the Identity Cloud login flow that will govern the obtaining of an Identity Cloud session. Therefore, even though Azure acts as the IDP, Identity Cloud controls how the user gets her session, whether the Azure session is enough or whether MFA is required and what authentication level the session is granted. My value for Sign on URL is:
https://idc.scheuber.io/login?authIndexType=service&authIndexValue=Azure
For a basic configuration, the defaults in the User Attributes & Claims section suffice and align with the Attribute Mapper configuration performed in Identity Cloud in step 2.
6. Download and modify Azure metadata from enterprise application
This step takes place in the Azure Active Directory Portal and in a local file editor.
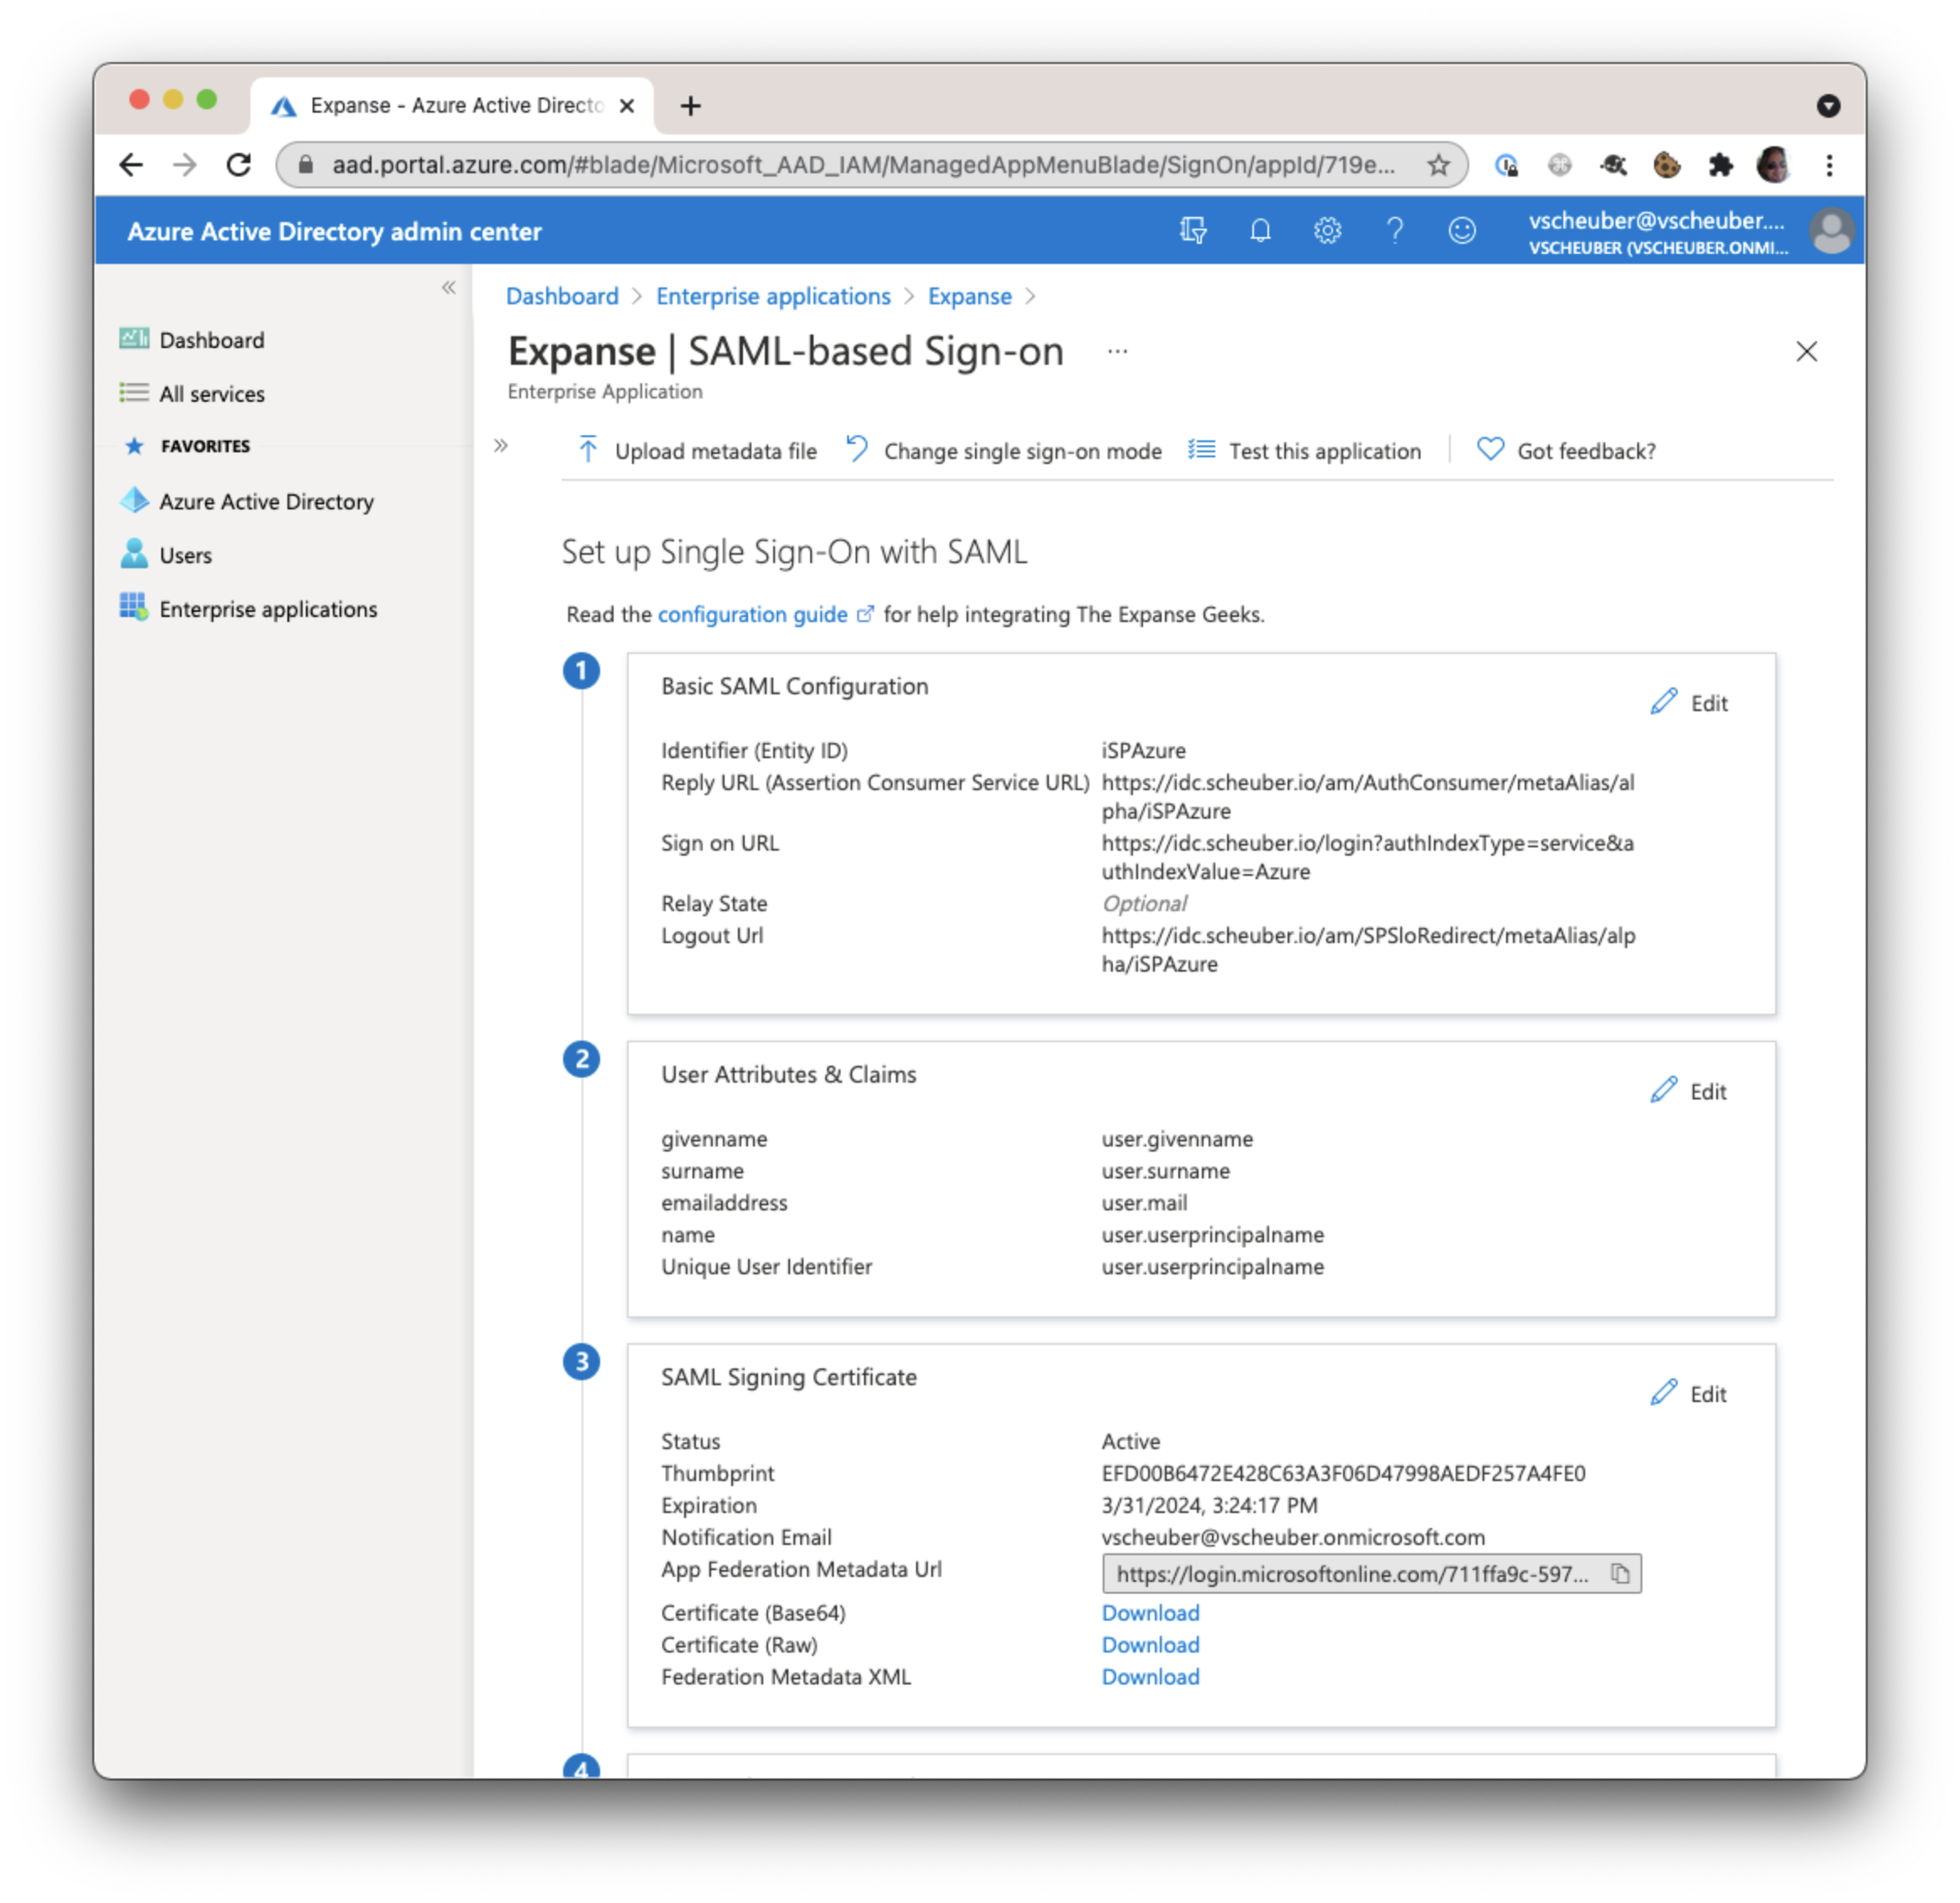 From the same Basic SAML Configuration page, select Download next to Federation Metadata XML in section 3 SAML Signing Certificate and save the Azure metadata to a file, e.g.
 metadata_AzureIDP.xml, which you will import into Identity Cloud to create a remote IDP in step 7, after you make some modifications.
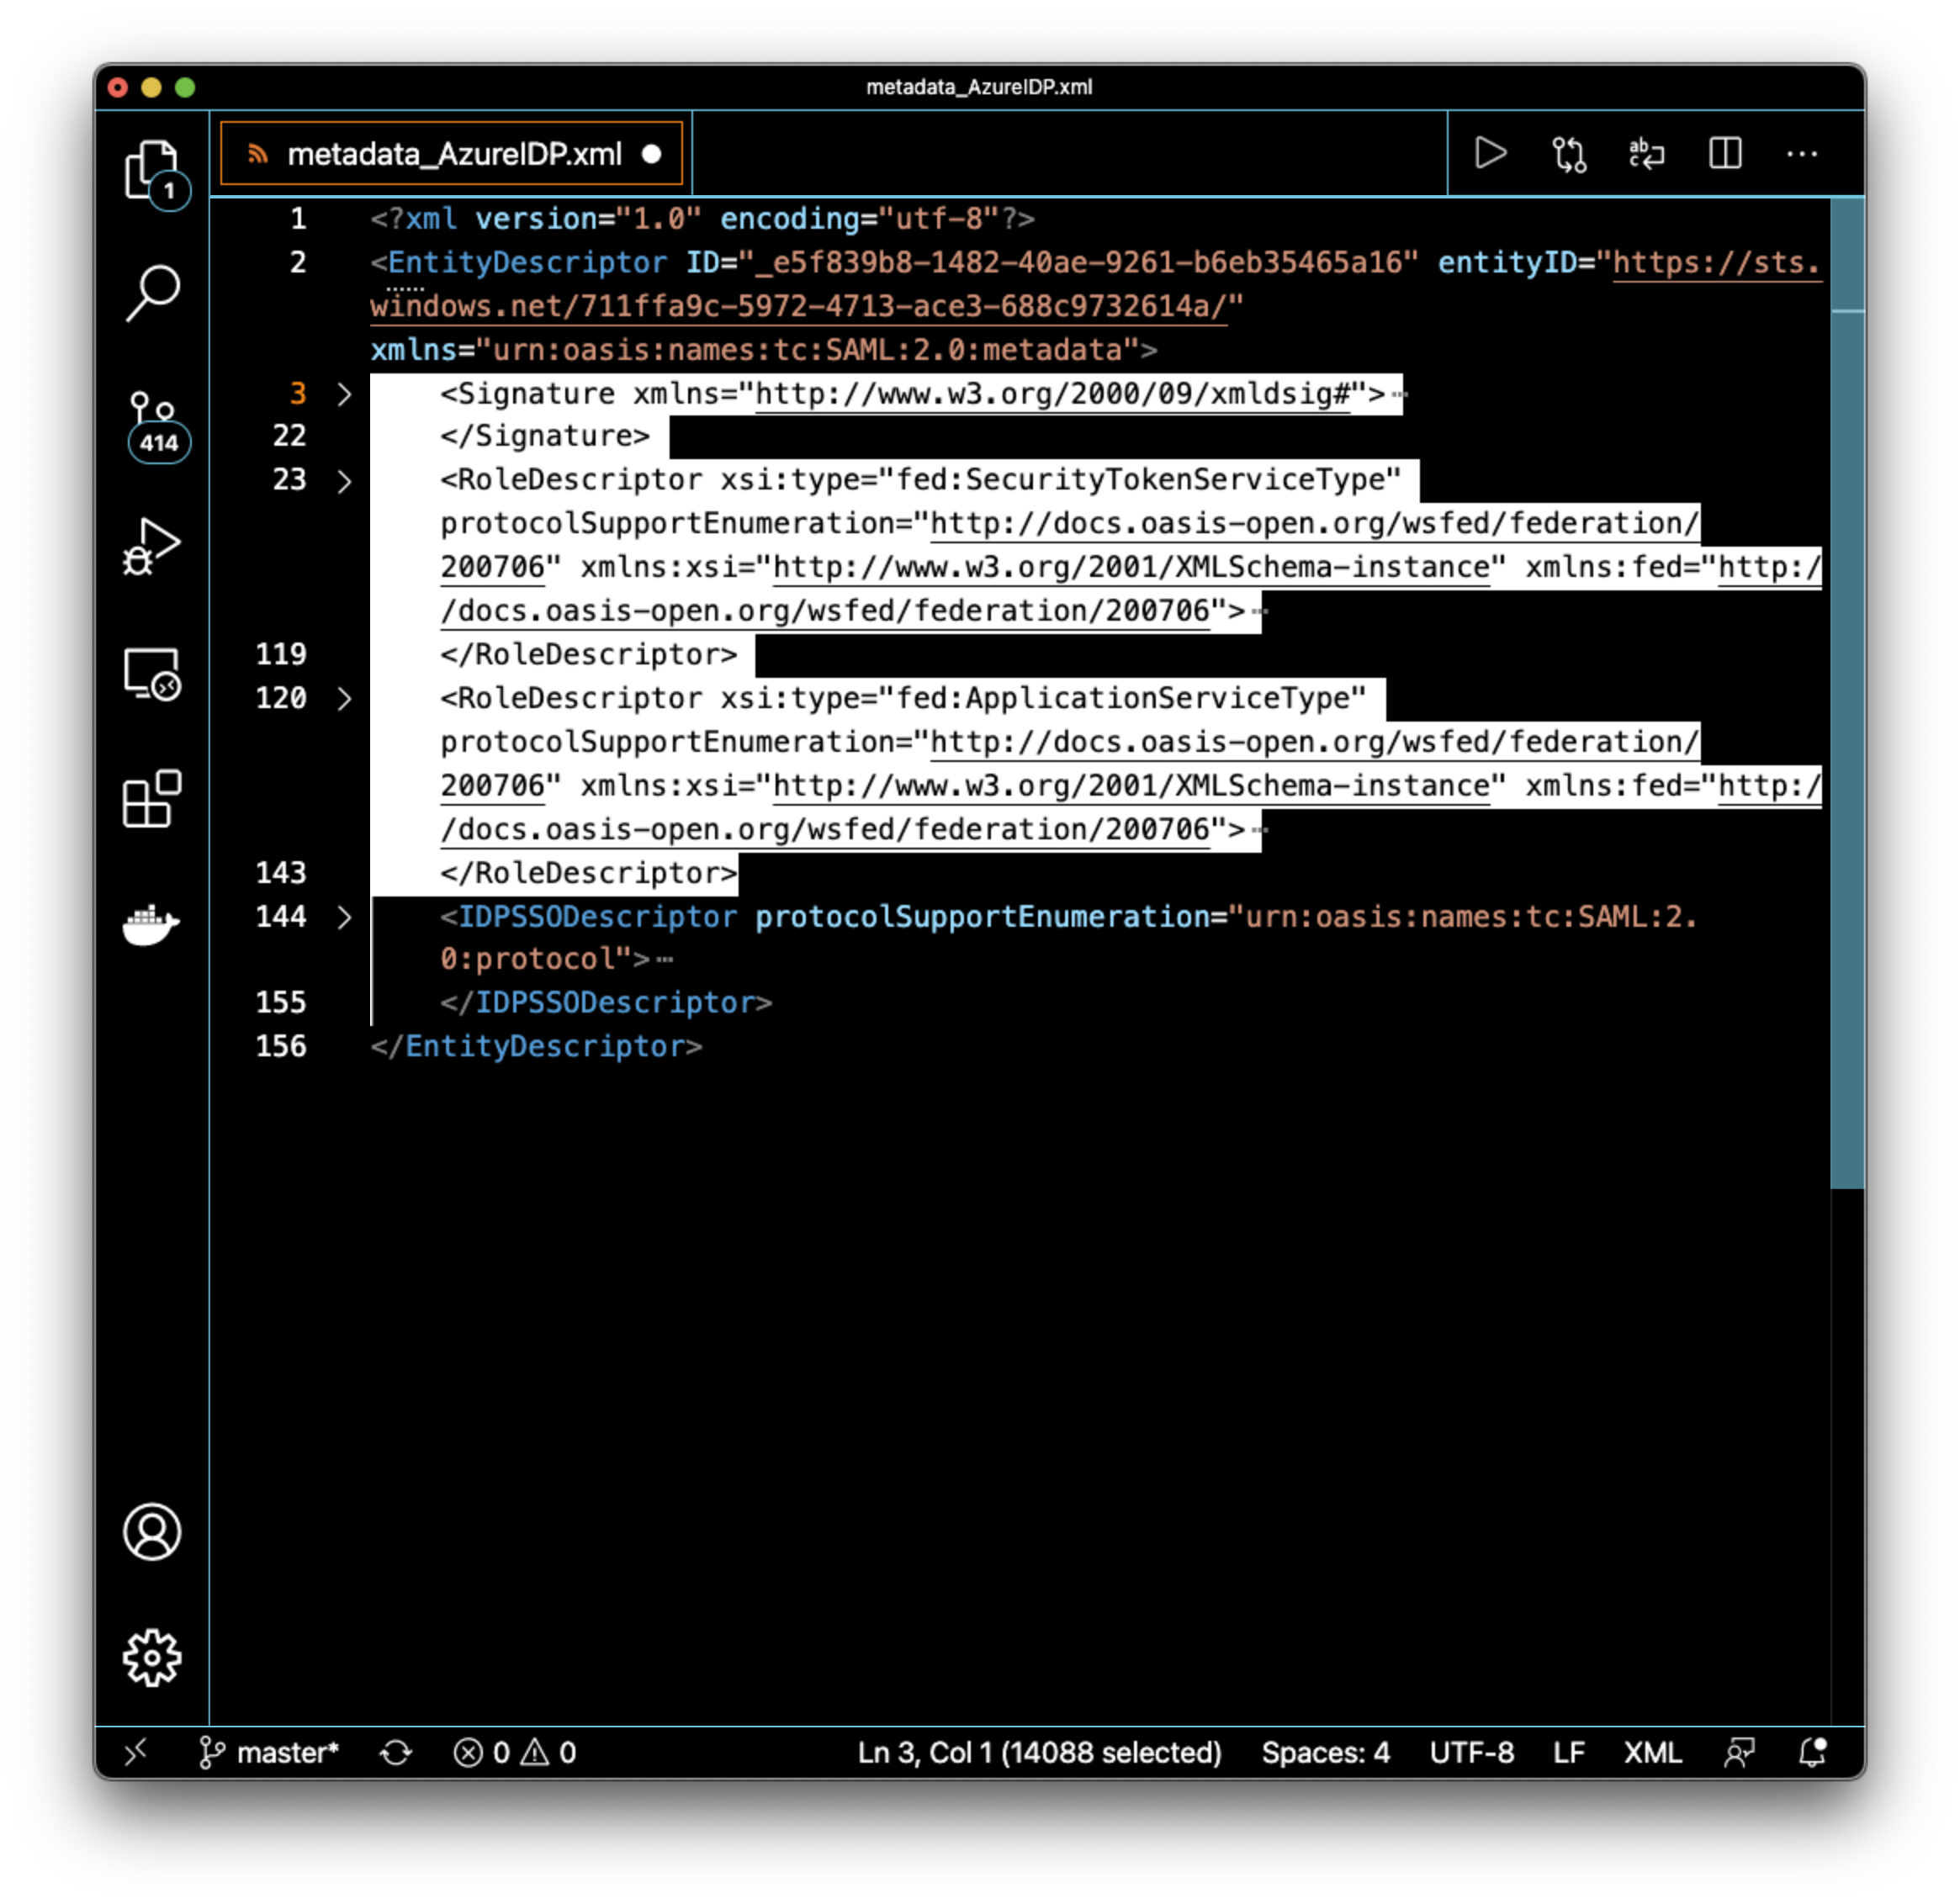 Open the file in a text or XML editor. If your editor supports XML-formatting, format the document so it is easier to navigate. The file includes Azure-specific and proprietary elements not defined in the SAML specification and not supported by Identity Cloud, which will result in import failure. These elements are irrelevant to the integration you are configuring and can therefore be safely removed.
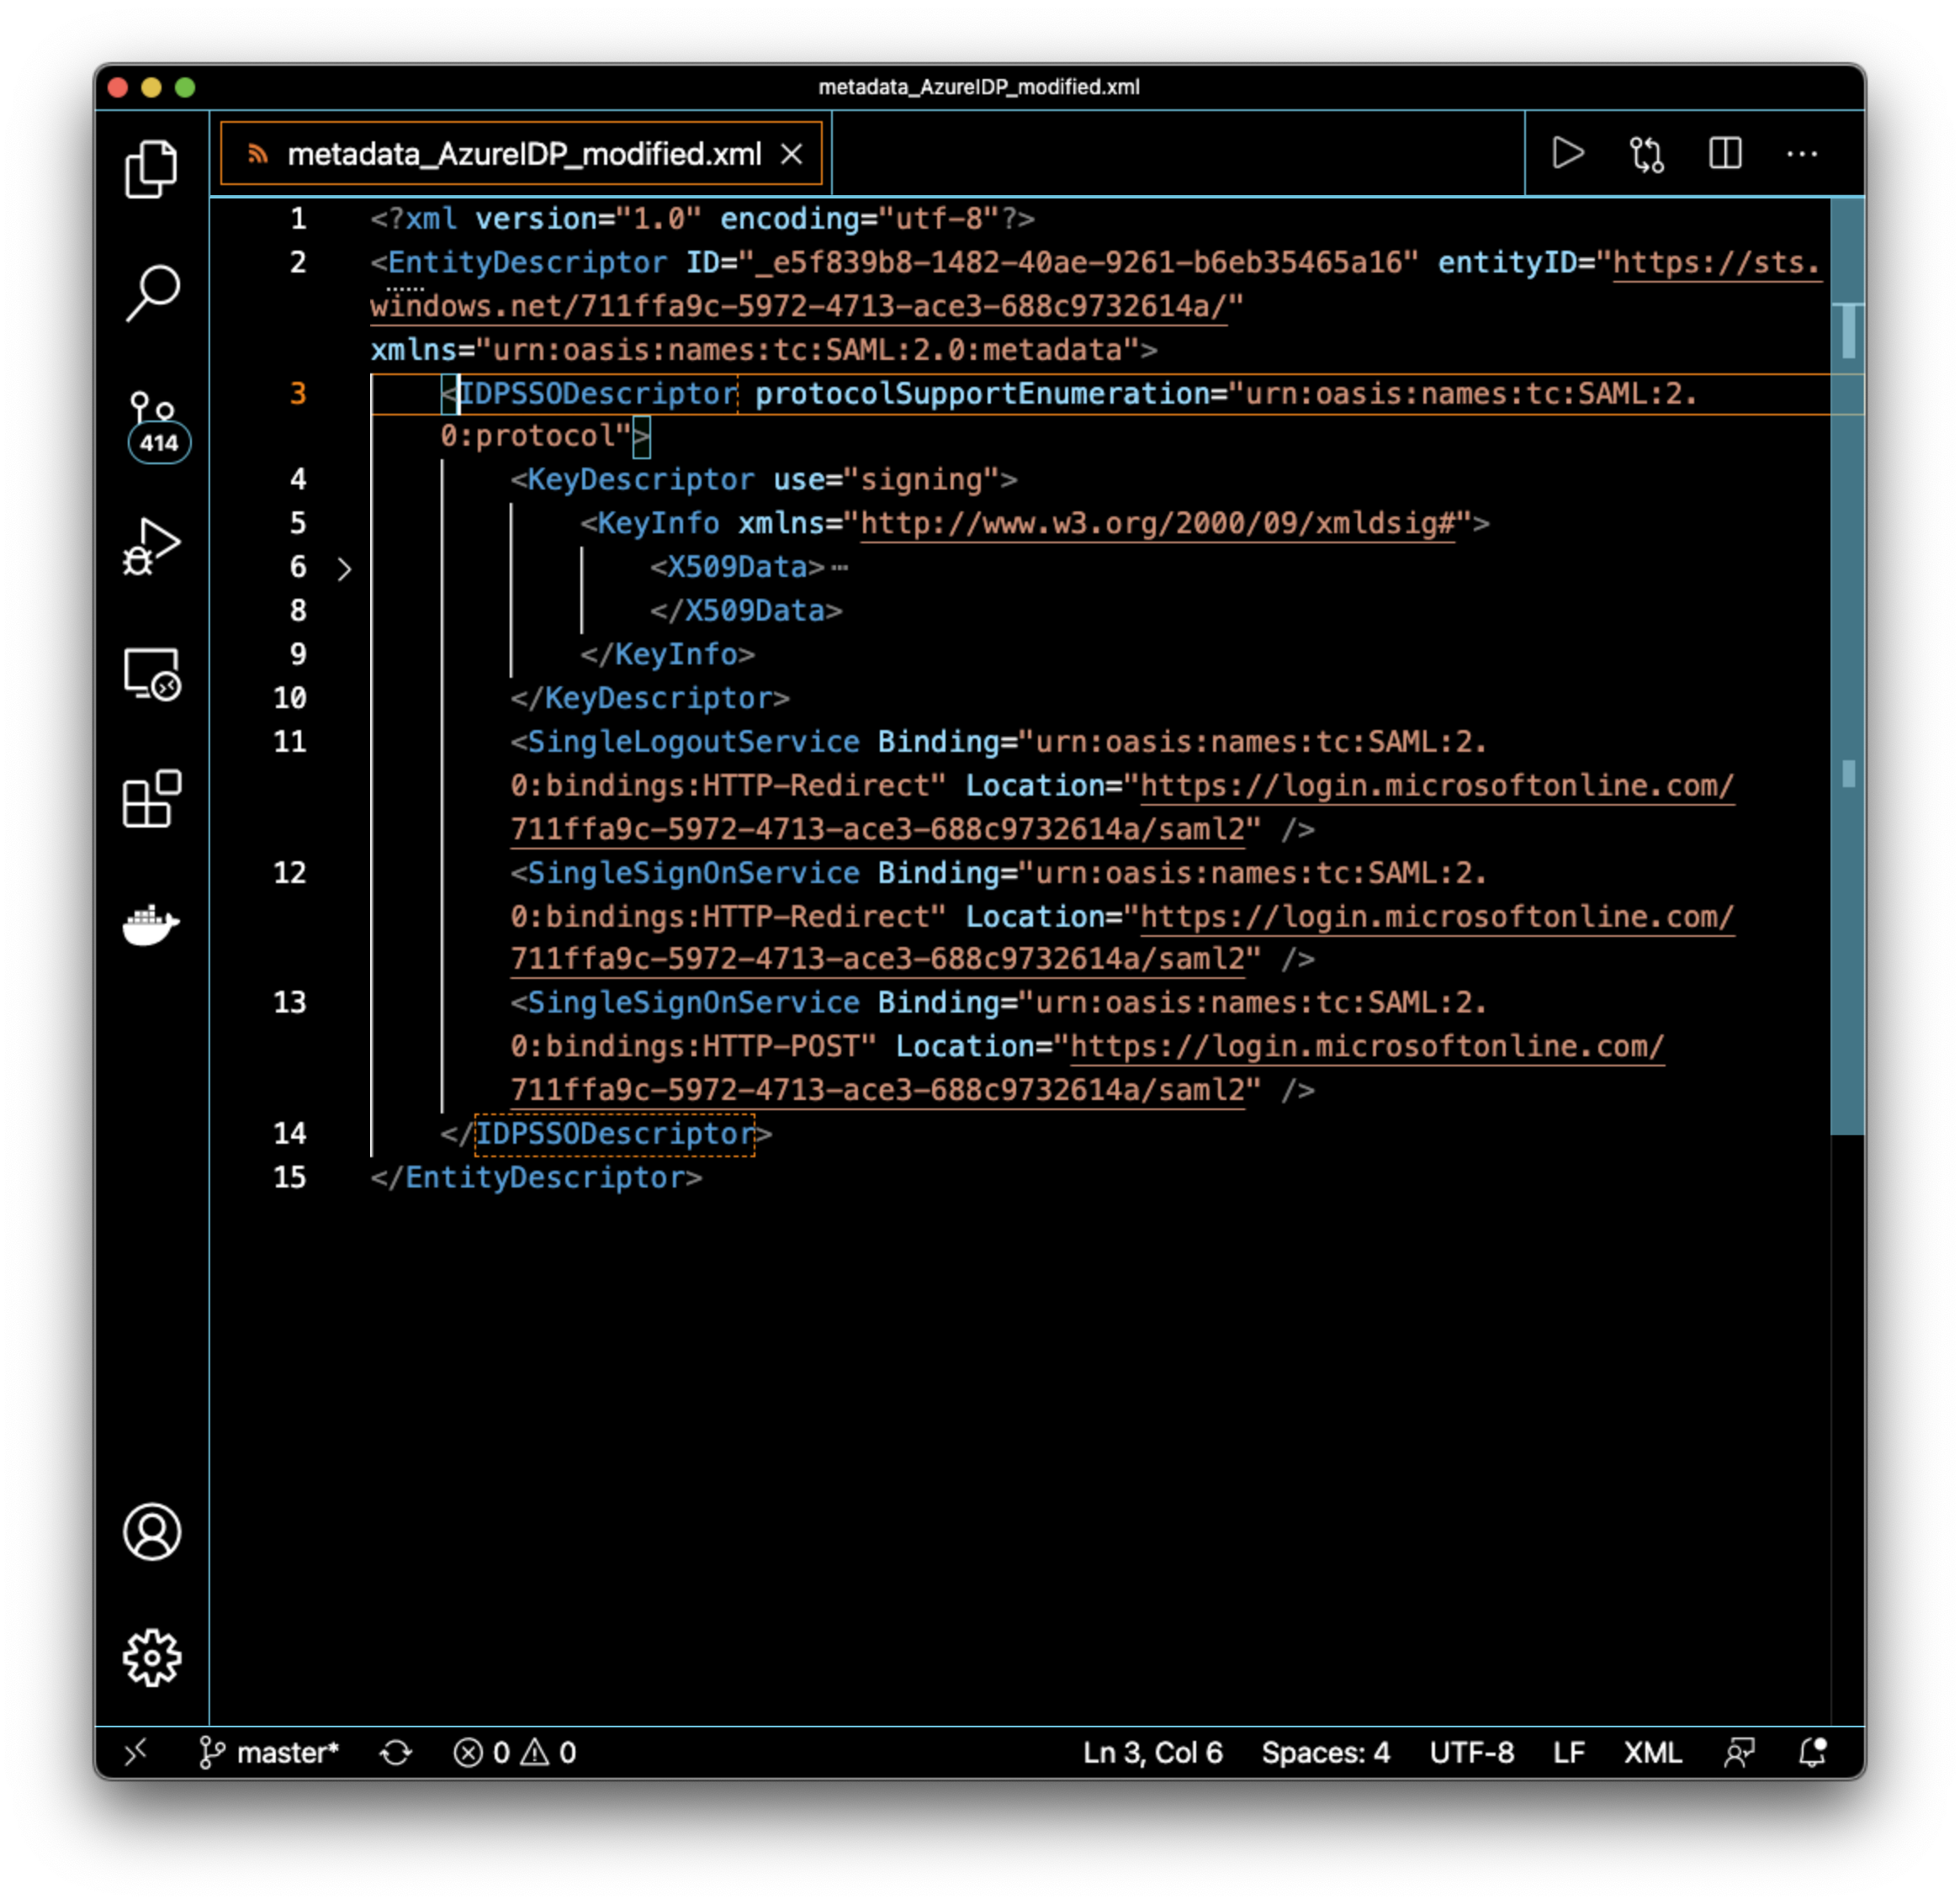 Remove the following elements under the EntityDescriptor root element: Signature, RoleDescriptor, fed:xxxx. In other words, remove everything except for the IDPSSODescriptor element, and save the file with a new name, so you can always come back to the original metadata.
7. Create remote IDP in ForgeRock Identity Cloud by importing Azure metadata
You are now switching context back to Identity Cloud. To begin, login to your tenant admin UI.
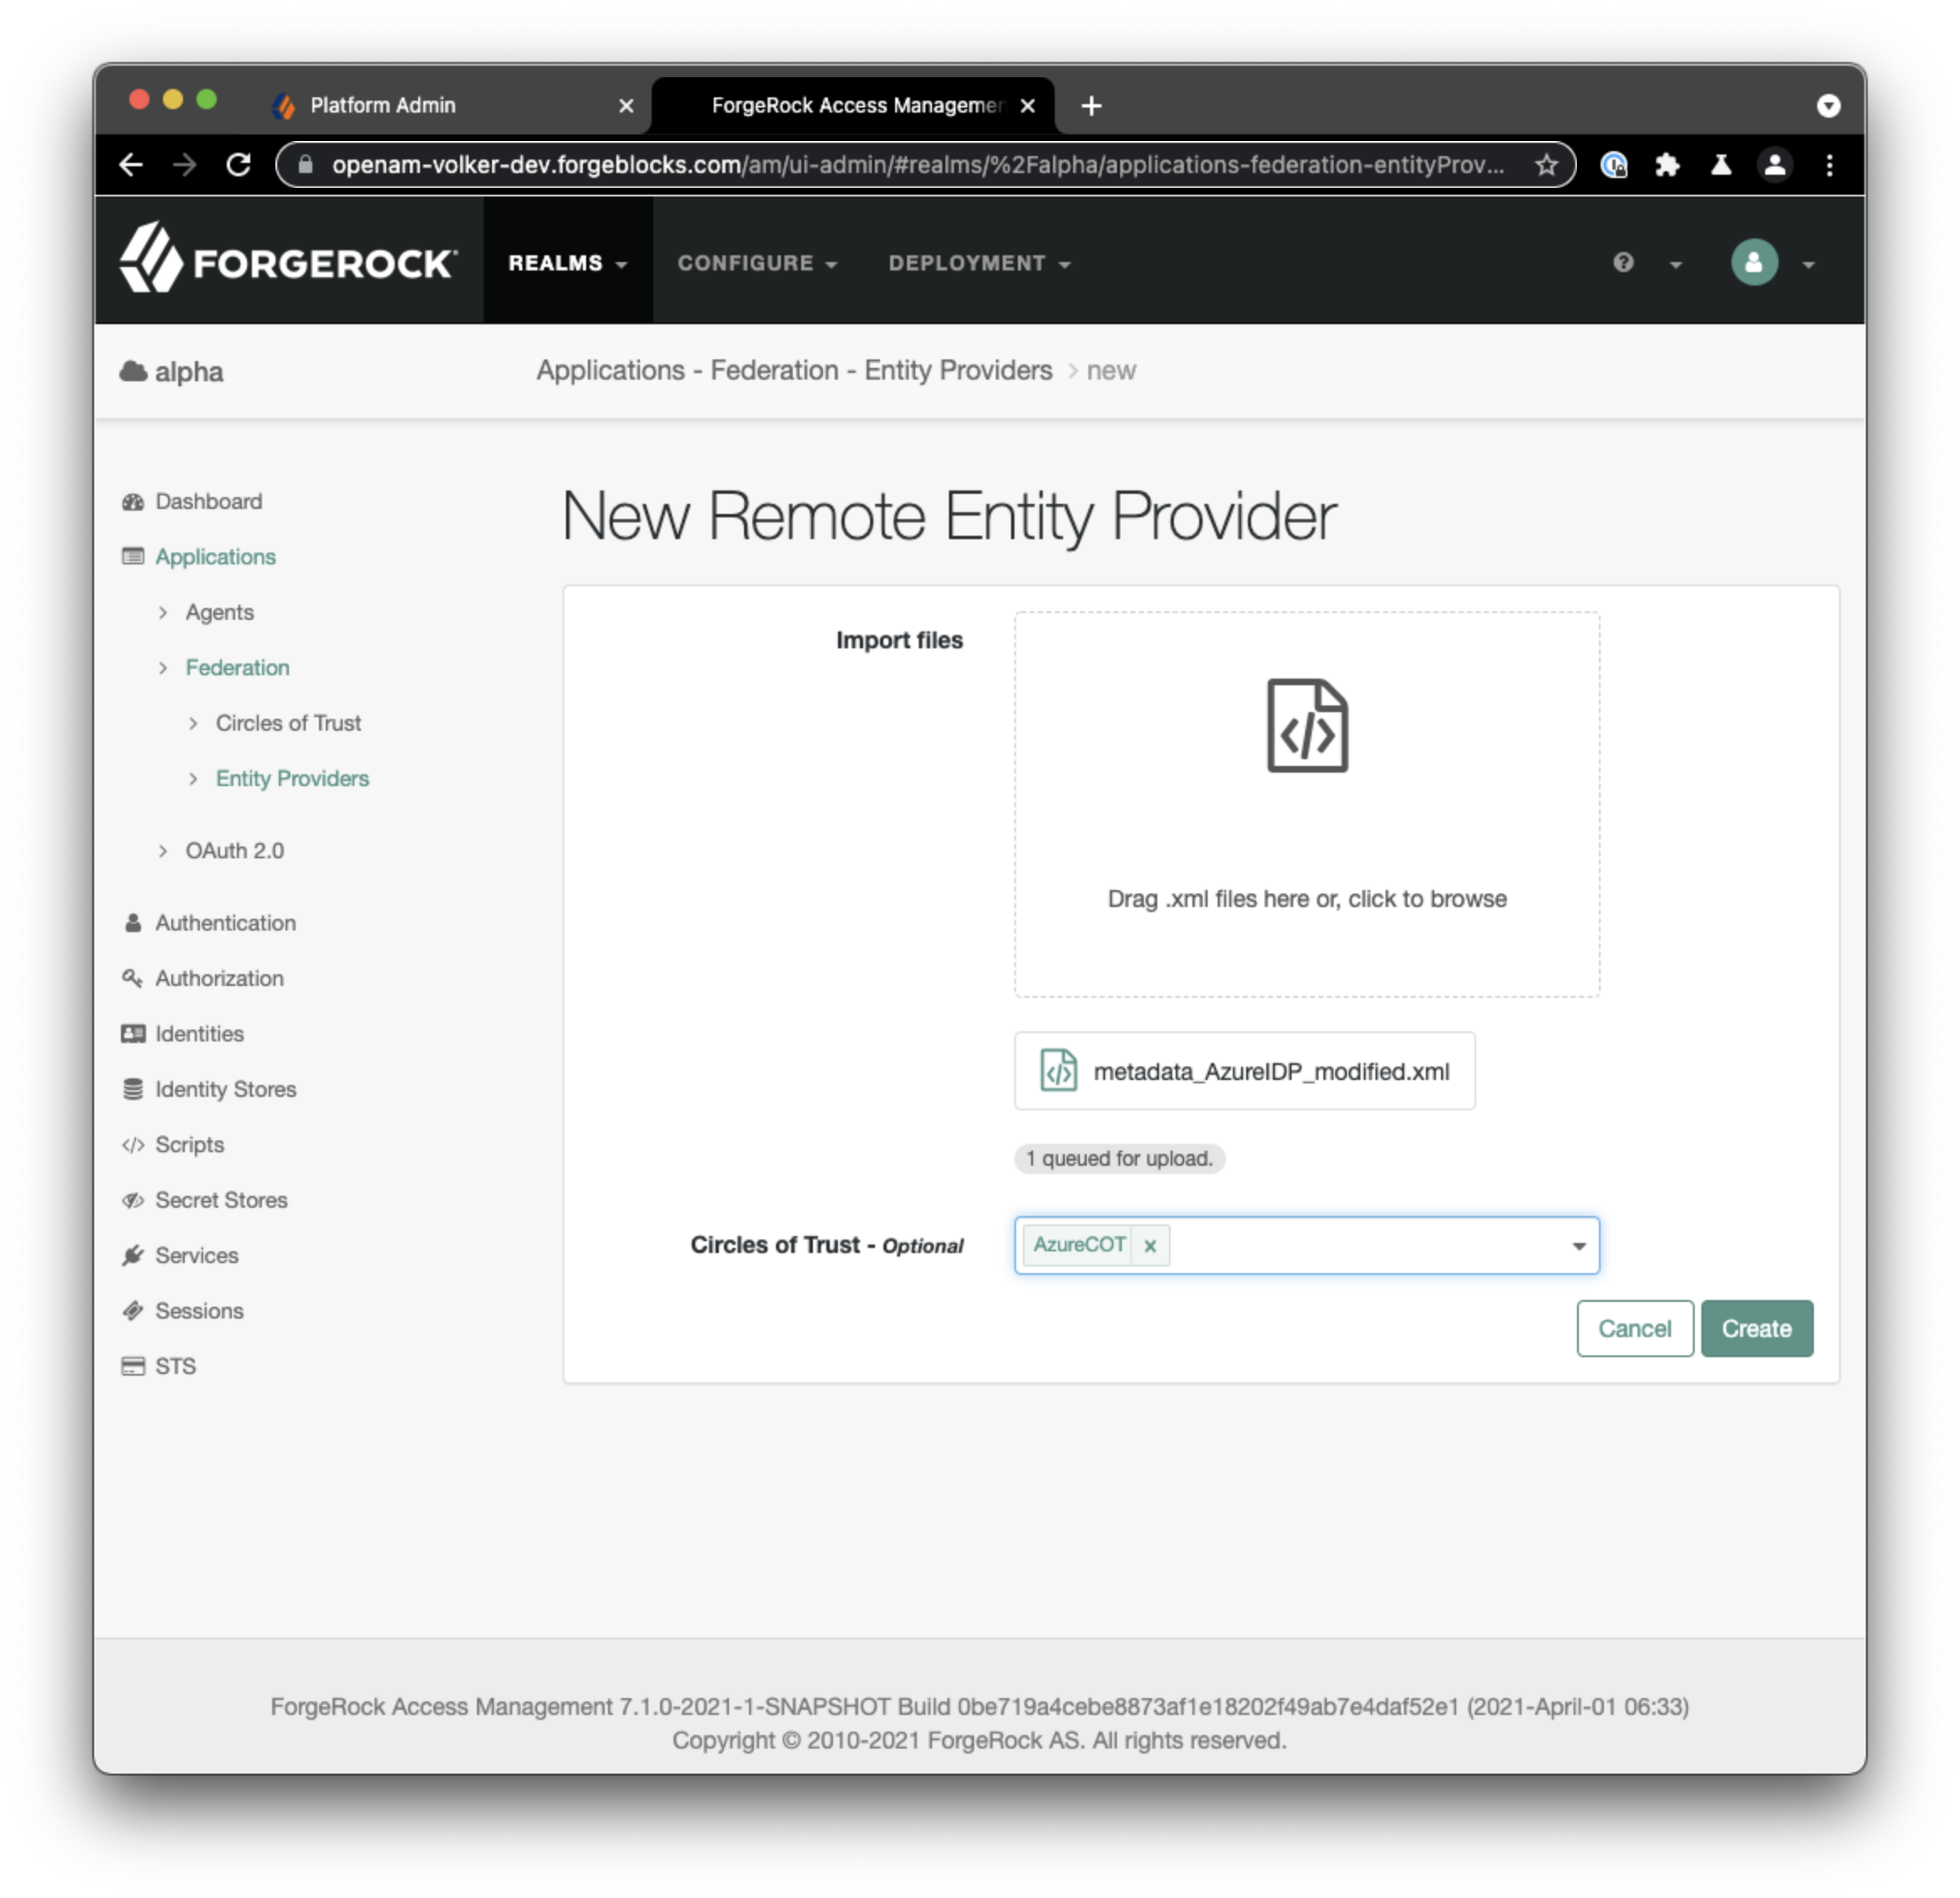 From the native access management console’s left-hand navigation menu select Applications > Federation > Entity Providers > Add Entity Provider > Remote. Select to import the modified Azure metadata file and select the circle of trust you created in step 1, e.g.
 AzureCOT. Then select Create.
8. Create authentication journey to control login flow
This is the last step, before you can test your configuration end-to-end. I will show you the quickest way to get the journey into your tenant, then we will discuss the details of what it does.
The quickest way to get the journey into your tenant is to import it using amtree.sh. Clone the GitHub repository and you will be ready to import and export journeys from and into Identity Cloud. Follow these steps:
- Download Azure journey
- From a linux or MacOS shell, run the following command to clone the
amtree.shGitHub repository:
git clone https://github.com/vscheuber/AM-treetool.git - Run amtree.sh to import the journey with a command line like this:
./amtree.sh -h [TenantURL]/am -u [TenantAdminUser] -p '[Password]' -r /alpha -i -t Azure -f Azure.json
e.g.:
./amtree.sh -h https://openam-volker-dev.forgeblocks.com/am -u volker.scheuber@forgerock.com -p 'Sup3rS3cr3t!' -r /alpha -i -t Azure -f Azure.json
Hint: Use an admin account without MFA, oramtree.shwon’t be able to authenticate.
 Once the import completes, switch back over to your browser window with the admin session to your Identity Cloud tenant and select Journeys from the left navigation menu. In the list of journeys you should see a new entry Azure. Click once on the new entry to see the preview, then select Edit while hovering over the preview image.
 Let’s take a look at the journey. I’ll leave the exploring of the details to you but I will call out the key points:
The first node, Azure Login, is an instance of the SAML2 Authentication node type. This node kicks off the SP-initiated SAML flow and takes back control once it completes. It then processes the SAML assertion and makes its contents available for the remainder of the flow (if you want to see what’s coming back, loop the Debug node in between the Azure Login and the Process SAML Data node).
I found it more flexible to implement a custom check whether an account already exists or not than to use the hard-coded mechanism of the SAML2 Authentication node (which is to use the SAML attribute mapped to the uid attribute). Hence I use a script to process the SAML data, then use the (new in Identity Cloud and the 7.x release) Identify Existing User self-service node with the appropriate search criteria. If the account exists, the journey issues the user a session. If the account does not exist, the flow drops down into the provisioning loop. This loop is using more of the (all new in Identity Cloud and the 7.x release) self-service nodes to determine if it has all the necessary data (mandatory attributes) to create the account. If so, the account is created and the flow completes, issuing the user a session. If not, the flow doesn’t give up and error out, but instead renders a short registration form containing all the mandatory attributes so the user can review the data provided by the Azure IDP and complete the missing fields, then the flow completes and the user ends up with a session.
Run Through SP-Initiated Flow (Integrated Mode)
Now it’s time to test the configuration. To do that, login to the Azure My Apps portal at https://myapplications.microsoft.com/ as a user you have granted access to the new enterprise application you created. Click the application icon and let the flow take you on the login journey.
Watch the full flow without any distractions in the first video. The second video pops the hood and takes you into the depths of fine-tuning the journey and making the login experience more secure and exciting.
Straight Run-Through
Pop the Hood
If you desire any control over the login experience on the ForgeRock Identity Cloud side, the SP-initiated flow is the only option if Azure has to act as the IDP. Choosing this option, though, opens up a whole new world of flexibility and superior user experience.
In this second video you could see additional journeys being used. All the artifacts shown in the video are listed below including downloads:
- MFAAutoSelect journey *1
- MFAWithEmailOTP journey
- MFAWithSMSOTP journey *2
- MFAWithVoiceOTP journey *2
*1 Contains script, which needs parametrization with Phone Validator API key.
*2 Contains script, which needs parametrization with Twilio API SID, Token, and Phone Number.
Epilogue
We have explored the reasoning behind using Azure as the IDP and the powerful capabilities of the SAML integration with ForgeRock Identity Cloud using the integrated mode.
Leverage existing sessions, like the once of Azure in this case, and allow your users seamless and safe access to an application landscape protected by ForgeRock Identity Cloud.
Check out the detailed write-up on the integration in standalone mode.
1 thought on “Integrate Azure With ForgeRock Identity Cloud – Part I”